

![]()
Repost from –> August 31, 2011 (edited)
My Farm-Kids Quilt is finished
How I quilt a quilt on my regular sewing machine
August 31, 2011 –> I finished my farm-boy & sunbonnet sue quilt today. I’m pleased as peaches with it. Especially since it was the first queen size quilt I ever made. Originally I made the quilt top full-size to fit our bed. I decided to change it to a queen-size because someday we’re going to need a new bed and I figure we’ll buy a queen-size instead of getting another full-size. Because of the extra-added size, I ran into a few issues, but I managed to work them out okay.
I want to share the method I used to quilt it. I’m lousy at taking quilt photos because I can’t get a really good angle, but hopefully, you all can figure out the gist of what I did.
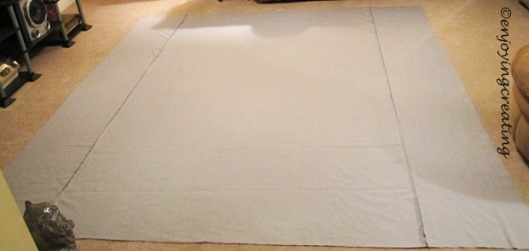 1) Lay backing on the floor wrong-side up
 2) Lay batting on top of backing
 3) Lay quilt top right-side up on top of batting.
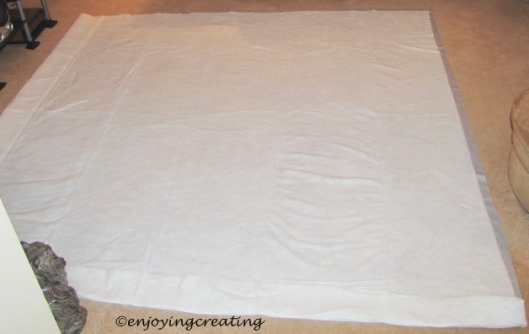
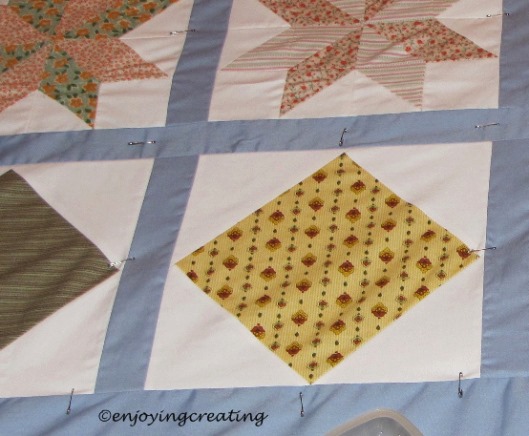
 4) Starting from the outer edge, Use safety-pins to join the top, batting & backing together.
Put safety-pins every so many inches all across the quilt.
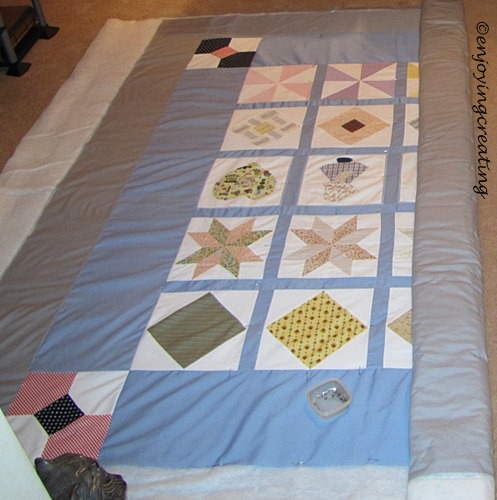
 I roll the quilt up as I go because it makes it easier to handle.
 5) After it’s pinned all the way across,
unroll quilt and spread it out flat.
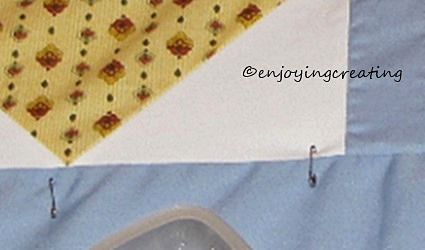
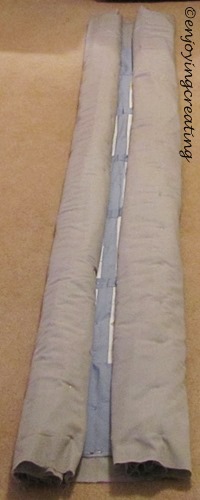 6) Starting at outer edge, roll each side to the middle
 7) Carefully slide the quilt under the pressure foot.
 8) Starting in the middle, Sew in the seam (ditch) or near the seam.
Be careful and remove the safety pins as you go and don’t sew over them.
Unroll the quilt as you go.
After you finish the first half, flip the unrolled half around and place the quilt back under the pressure foot and continue until you reach the outer edge.
*The main idea is to start at the center of the quilt and work your way to the outer edges.
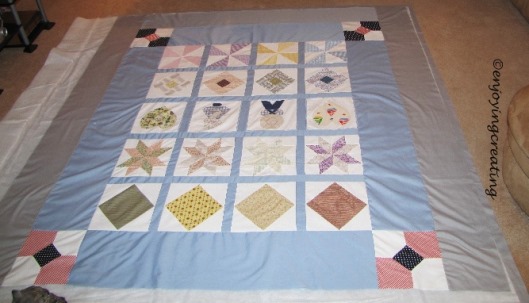
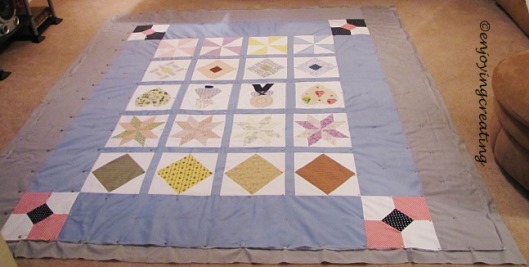
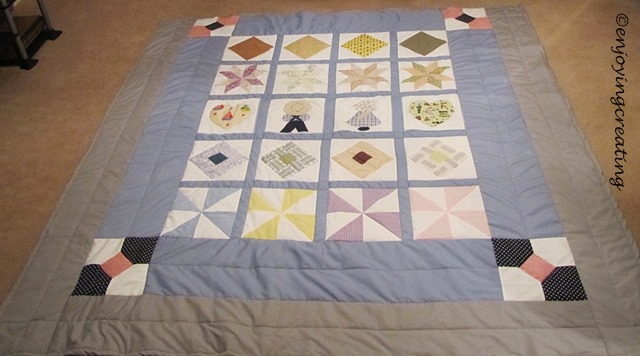 9) Here’s the finish quilted quilt
It’s 90″x93″ inches
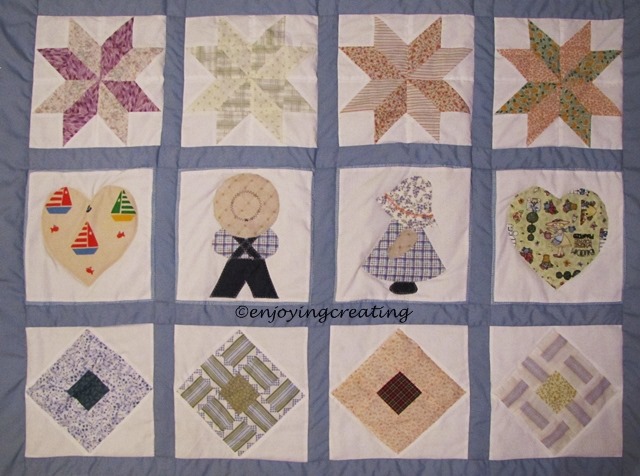 10) Above photo is the middle after it’s quilted.
 11) Here’s what the back of the finished quilt looks like
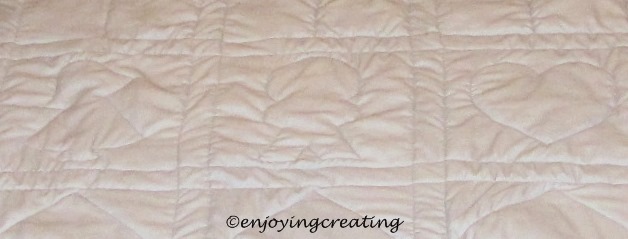 12) Here’s a close up of the back of the finished quilt.
All-in-all I think it turned out quite well.
It’s soft and snugly and will be warm this winter.
![]()
Today, January 24, 2015
After I finished the quilt I didn’t like the squared corners, so I rounded them off.
Also, originally, when I made this quilt we didn’t have a queen size bed. I guessed at the dimensions.
We got a queen size bed this past fall and I was surprised delighted to see my quilt fit perfectly.


Absolutely stunning, such a wonderful work! I particularly like both the boy and the girl, they look so cute 🙂
LikeLiked by 1 person
Thanks so much LBS
The kids were fun to make. 🙂
LikeLike
That’s beautiful!
LikeLiked by 1 person
Thanks Dianna 🙂
LikeLike
It looks fabulous! I like the way that you rolled it up to keep everything in place.
LikeLiked by 1 person
Thanks CT
It makes handling the bulky mass much easier. 🙂
LikeLike
Very pretty, E.C. I know working with a quilt this large is a lot of work!
LikeLiked by 1 person
Thanks so much Charlotte
It required alot of handling and moving around, but I was real pleased with the results. 🙂
LikeLike
Positively gorgeous!!
LikeLiked by 1 person
Thanks so much Renee 🙂
LikeLike
Wow, you make it look almost easy… which I’m quite sure it’s not. Beautiful work.
LikeLiked by 1 person
Thanks so much Ty
You nailed that one lol. Nah it’s not as hard as it looks. It does require alot of handling, but it’s satisfying seeing my finished work.
🙂
LikeLike
Beautiful. My wife loved it very much.
LikeLike
Thanks so much Sartenada 🙂
LikeLike