Another finish – Bright Tote Bag Lining

2013-brighttote
I’ve finished another project from my sewing project bag. I made a new liner for a tote bag that I made back in 2013. This Bright Tote Bag was the first big loom knit project I made. I used a Martha Stewart knitting loom. I single-crochet-chained every inch of yarn I used. It took a long while, but it was really enjoyable and worth the effort. Making this tote bag project helped me better my loom knitting skills.
The stitch pattern is what I call a ‘basket-weave’. I’ve heard it called a tile stitch and a cobblestone stitch. Doesn’t matter what it’s called, it was a fun stitch to do. I think it looks pretty good for my no-pattern first attempt at a loom knit project.
I’ve always liked the look and colors of this tote. I’m happy with the beads and oblong toggle button, both of which I sculpted out of polymer clay.
However, I never liked my open-pocket lining (lower left side of the collage-photo). Since I’ve figured out the method for setting zippers in the pockets in linings, I decided it was time to replace the lining in my old Bright Tote Bag.
It has a zipper-pocket on each side inside.
One side zipper-pocket is big enough for my 8-inch kindle fire and the other side pocket is big enough for a mobile phone and some other small stuff.
I’m ever so much happier with my old Bright Tote Bag now.

Wishing everyone a happy week of sunshine and smiles.

Christmas 3 Trees Tealight

I designed and created a Christmas 3 Trees Tealight.
The 3 trees are made melting pony beads and a metal cookie cutter.
I left the trees sort of rough edged like they might be in the wild.
I hot glued the trees together to make them like a tent to set over a battery operated tealght candle.
I made a small red ball out of polymer clay for the top of the trees and painted it with clear glittery paint.
I made a base for the trees/tealight using the same method I made the trees.
I set a battery operated tealight on the base and set the tree tripod over it.0-all-tetrelght
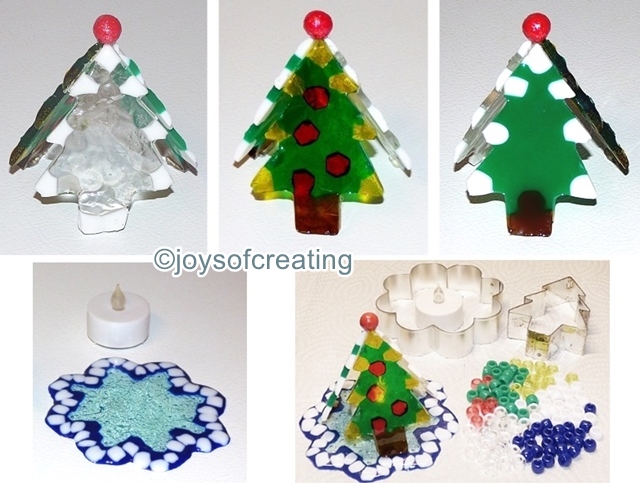
I like the design pretty well. It’s different because depending on where you’re sitting determines which tree you see… unless you put it on a rotating base.tetrelght

Wishing you crafting fun this holiday season!

*just an extra note:
I fashioned a temporary rotating base out of an old music box to make the short video to show you each tree of the tealight lit and flickering.

.

Cool looking craft – DIY Fake Ice

Updated 7-14-2017

IMG_3021
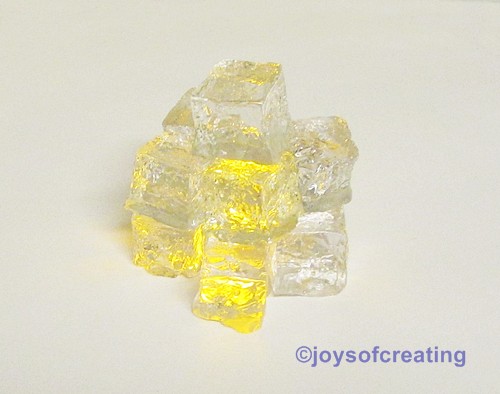
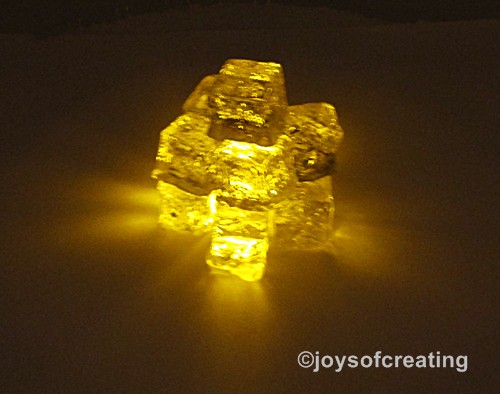
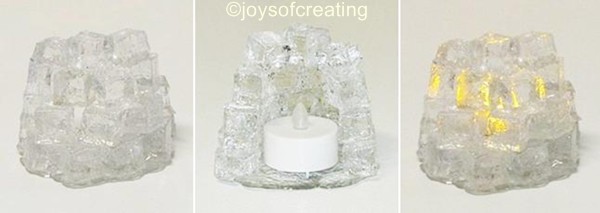
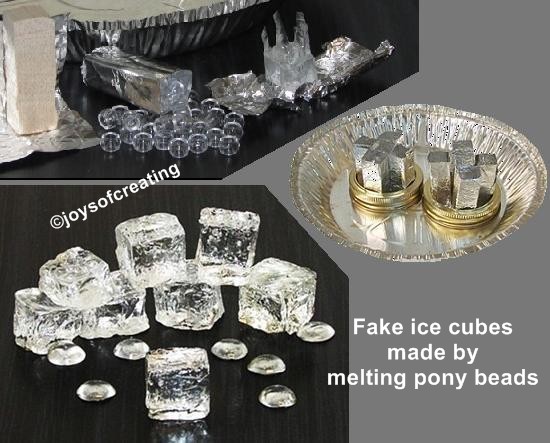
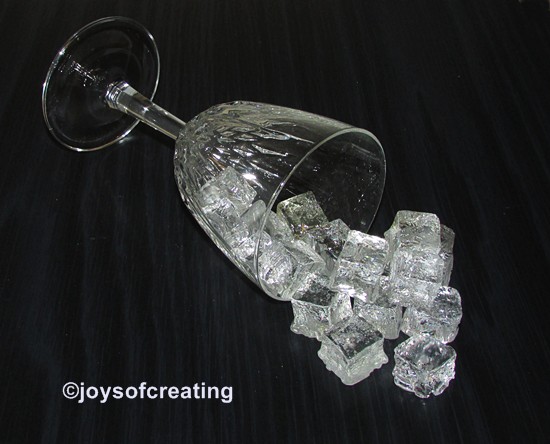
I learned how to make ‘fake ice cubes’ by melting clear pony beads.
The tutorial I followed was on flickr.
Unfortunately that tutorial is now gone. However, I’ll look around and see if I can find another tutorial that is easy to follow… or I may make one myself. Either way, I’ll update this post in the future.

It took a few tries for me to get the hang of it. I really like the results.
I’m amazed at how real the fake ice cubes look.
I can think of several projects to use the fake ice cubes with.
IMG_3037

Have you ever made fake ice?
I hope you all Have a cool day!
icsmilemo

~*~
IMO – This craft is Not for children!
~*~

0-isesteps
The tutorial I used is now gone. But here are a few things I did that made the process easier.

There’s a few things I adjusted, added or did different.
*I used balsa wood to make my ice cube form.
*Keep the area well ventilated: I opened my windows and turned on ceiling fans and ran the stove-hood fan.
*Apparently my oven doesn’t heat as hot as the author of the tutorial’s does.
I had to bake at 400° to get the beads to melt successfully.
*I also had to bake them longer: I’d put half the beads in the form and bake them for 15 minutes then put the rest of the beads in and bake for another 15 minutes.
*Keep a close eye on these as they bake to make sure they don’t burn.
*Let the cubes cool before trying to unwrap the aluminum foil.
*To give the cubes a shiny finish, after I peeled the aluminum foil off my ice cubes, I trimmed off the shards and rough edges and then put the cubes back on the pan and in the oven for about 3 to 5 minutes.  I was careful to watch so they wouldn’t melt too much.
*I took them out of the oven and let them coolicsmilemo

egglight4
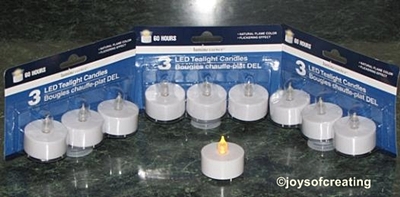
Using a battery operated tea light
I made a fun little icy temporary tea light.

1-IMG_30112-IMG_30053-IMG_3007icsmilemo

edited in 6-11-2014:
I made this tea light by gluing the fake ice cubes together with E6000 glue.

01-IMG_3122
end of edit…

icsmilemo

There’s a few tutorials on the web on how to make fake ice by melting beads in metal ice trays.

icsmilemoI apologize for the missing links to the tutorial.
I’ll try to do an update soon. with either my own tutorial or a link to one.

.