Monday Mix – 5-5-2014

IMG_0639
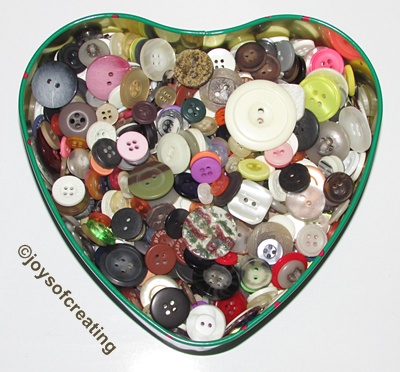
When I was growing up, I was taught to save buttons off old clothes just in case I might need them later on. Indeed over the years, old buttons has saved me money and time.
IMG_0624Well, this weekend, I learned something new and I’m going to share it with you… Awhile back, the slider part of the zipper in a pair of shorts broke. I had to order a pack of zipper sliders. I thought they were over-priced, but they’re still cheaper than buying new shorts. After I put the slider on the zipper and had the shorts ready to wear, it suddenly occurred to me that I should save the sliders off old pants or clothes that we’re going to throw away.  If I had been saving sliders over the years, I may not have had to buy any.  Cool, I learned something to help me in the future. (If I can remember it and it doesn’t slide out of my memory. lol 😉 )

IMG_06571 
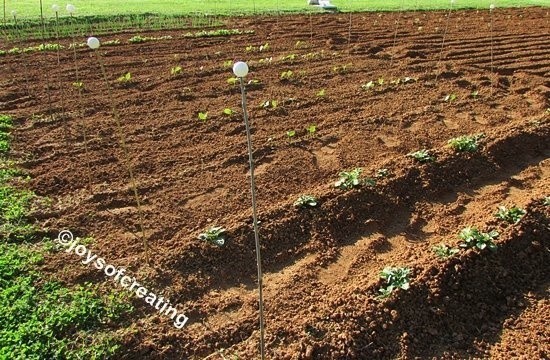
We got some more of our garden planted this weekend. I still have a few squash & cucumber seedlings to plant in the garden, but they’re not old enough yet. They need to put on some true leaves and grow a bit more.
Most folks plant squash and cucumber seeds directly in the garden and the seeds do great. Our garden is real contrary and doesn’t start squash and cucumber seeds well at all. I wish it did because it would make less work for me. Thankfully, after the seedlings are planted in the garden soil they’re usually productive.

IMG_0660We sure have enjoyed sitting on the porch these warm (windy) days. It’s so comforting watching the world turn luscious hues of green. I hope everyone had a good weekend. Here in our area, it was really nice. The temps got up into the high 80’s and the forecast looks good for the next few days.

I hope you all have a pleasant week.
🙂

0rangespacer2

May Wreath

02-IMG_0416For my Wreath of the Month for May, I decided not to do traditional flowers and fluff for this special month, I decided to give tribute to the creative side of Motherhood. Mom’s are the most creative people I know and I’m not talking just crafts either. As I’m the only Mom in this house, I chose some of my favorite stuff to put on my May wreath.

I sculpted the loom & loom hook and then made the little red toboggan on the loom (just to see if I could.)
My sister sort of stepped in the role of Mom after our Mother passed on. She’s spent alot of time and care on me and my family. She’s my Bff and responsible for introducing me to the addictive and enjoyable craft of looming.

I sculpted the crochet hook and it does work, but it’s close to an ‘I’ size, so I crocheted the little granny square with a metal size ‘G’ hook. The size ‘G’ hook was my Mom’s. I think of her every time I use it. I’m thankful she gifted me with the love of crochet.

0IMG_0389

click to read big size

.
I made the cell phone with plastic canvas. I hope it looks like a bit of Excessive Crafting like I really made a plastic canvas case for a cell phone. lol
I made the texting with my image program. The text advice is something I’ve shared many times with my family. Crafting to calm down is a pleasant and enjoyable way to relax.
My Bff has on more than one occasion echoed these words back at me when I get stressed.

.
.
I sculpted the spoon and fork in honor of all the meals and cooking that goes into raising a family. (and also for us old folks after the little birdies have left the nest.)

My embroidered red-work heart is for sewing. It makes me smile remembering all the buttons, costumes, clothes, toys and stuff that I’ve mended or made over the years. I’m so thankful that my Mom gifted me with the skill of sewing. She spent many an hour and many a day happily sewing away on apparel or quilts or toys. She was an amazing lady.
I think my mason jar ring worked out nicely for a frame for my embroidered heart.

I crocheted the 3 daisies awhile back, but I wasn’t sure what I wanted to use them on. I needed another something for the wreath and happily they fit okay.
Plus my Mom never met a flower that she didn’t like and pretty much I’m the same way. Gardening is a wonderful gift she passed on to me too.

The wreath base is made of newspaper and covered in knitted yarn blocks made on a cardboard loom.

I’m sorry I’m running so late on posting this. I’ve had a bit of a goofy week and can’t seem to get organized.

Wishing you all a Happy May!

t6202

~*~
Here’s why I’m making a ‘Wreath of the Month’ for every month of 2014.
~*~

0rangespacer2

Flashback Friday – An Easter Gift For children (& adults)

0501lg

For this Flashback Friday, I chose to re-post my free to print-off coloring pictures in honor of Easter. I hope you all or your children enjoy them. 🙂

Here’s a gift from me to you. It’s a few coloring pictures from my collection (that I drew and had posted on my ex-website many many years ago.)

I hope you’ll print these pictures off for a child or children, to color to celebrate this special weekend.

Before you print these off:
Click on the images to open a separate picture.
Do a print preview to check to see if you may need to set it to ‘landscape’ to print these off properly.
At the top of your browser on the far left hand side choose ‘File’, then choose ‘Print Preview’
At the top of the print preview page is an option for ‘portrait’ or ‘landscape’
Try both and choose the one that fits the picture to the page best.

Happy Easter my Dear Blogging Buddies & Readers!

crs1lg
crs2tb1lg
crs3rt1lg

God Bless You All!
I wish you all a Safe & Pleasant Easter Weekend.
group-hug
bunnydance
3-spcbg

Great Glowing Easter Eggs

egglight1
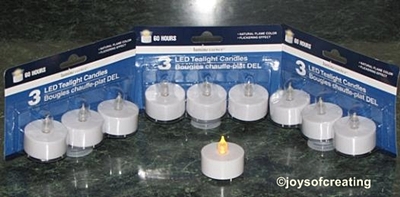
As I was going through my old blog picture/files I came across the many different holders/displays I made for battery operated tealights.
I decided not to wait til Friday to post this Flashback because Easter is coming up and this might make a fun decorating idea for someone to use.

egglight2
This is one of my more favorite ideas that I put together. I placed battery operated tea lights in plastic eggs. They’re such a fun inexpensive decoration.

egglight3
My husband told me that I needed to drill a 1/16 inch hole in the plastic egg so the heat from the battery operated light can vent out.

So, if you decide to use this idea of putting battery operated tealights in plastic eggs, be sure to drill a hole in the eggs to help the heat vent out.

Be sure to keep an eye on the eggs and tealights in case they over heat and need to be turned off.

Here’s wishing you all a very bright
& cheery rest of the weekend.

smileggs

~*~
Here’s a photo pf the battery operated tealights I use.egglight4
🙂
3-spcbg

Flashback Friday – Bunny Sculpt Tutorial

bun4Today I’m going to start having  ‘Flashback Fridays’ each week where I’ll re-post a craft or something from my old blog ‘Enjoyingcreating‘. I have several crafts and things from it that I think would be fun to share again here on my new blog. Plus, this gives me another opportunity to keep my blog active.

I hope you all will enjoy seeing my crafts and things from years past on my ‘Flashback Fridays’ postings.

To start my ‘Flashback Fridays’,  since we’re in the early throws of Spring and Easter is coming up soon, I decided to post my ‘Bunny Sculpt tutorial’.

This little bunny is about 2 1/4 inches long when it’s finished. The photos make it look bigger. It’s cuter in real life.

bunnydance

Let me know if you or your children make a bunny by this tutorial. And be sure to take some pictures too. I’d love to see your creative little bunnies.

I originally made this tutorial for polymer clay, but you can use homemade clay or air-dry clay.

~*~
If you use air-dry or homemade clay, please remember to ignore the baking instructions.

~*~

Bunny Sculpt Tutorial
~Adult supervision is required~

Supplies:
polymer clay or an air dry clay
a toothpick

.
.
.
Make the following pieces:
1 – 1 1/2 inch oblong ball of clay for body
1 – 1/2 inch round ball of clay for head
4 – 1/4 inch small oblong balls for feet
1 – 1/4 inch round ball for tail
2 – 1/2 inch cone shapes for ears
.
.
.
.
.
.
.
.
Press the clay in place as follows:
1/4 inch round ball on one end of the oblong body.
1/2 inch head ball at the other end of oblong body.
4 small oblong balls in feet positions.
2 cone shapes on top of head for ears
bun3
bun4Next you need:
1 tiny light pink ball of clay
2 tiny dark pink balls of clay

Press the clay in place as follows:
2 dark pink clay balls in eye positions
1 light pink ball in nose position
Take a toothpick and draw a smile
and dent the eyes to make pupils

~*~

If you’re using air dry clay, you’re finished.
Set your Bunny sculpt somewhere safe and let it dry.

~*~

If you’re using bakeable clay then go to the next steps.

.
.
Before baking,
Pierce the body underneath to allow
clay to bake thoroughly so it won’t
crack or poof or something.

Bake the polymer clay bunny at the manufacturers recommended temperature and for the recommended length of time.
Allow bunny to cool before touching.
.
.
Tah – dah, you’re done and have a wee little bunny figurine.
bun6

bunnydance

I hope you all enjoyed my Flashback Friday.
It was fun sharing my bunny sculpt with you.
It’s always been one of my favorite sculpts
because it’s simple and makes me smile.

Here’s wishing you all a hoppy good weekend!
bunnydance
3-spcbg