April Wreath

easta1aI got a carried away with my April ‘Wreath of the Month
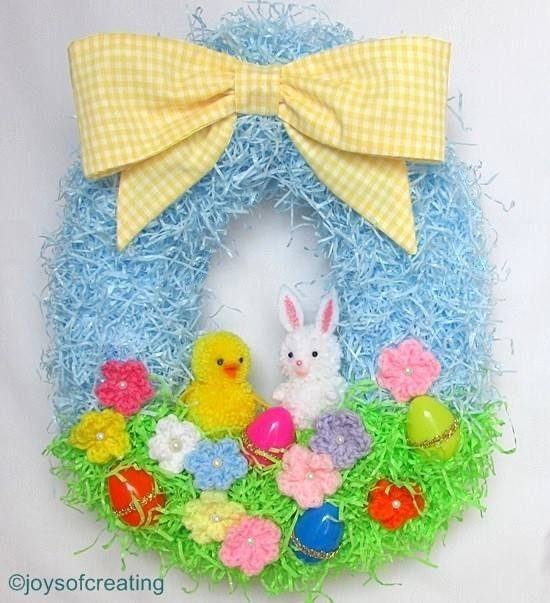
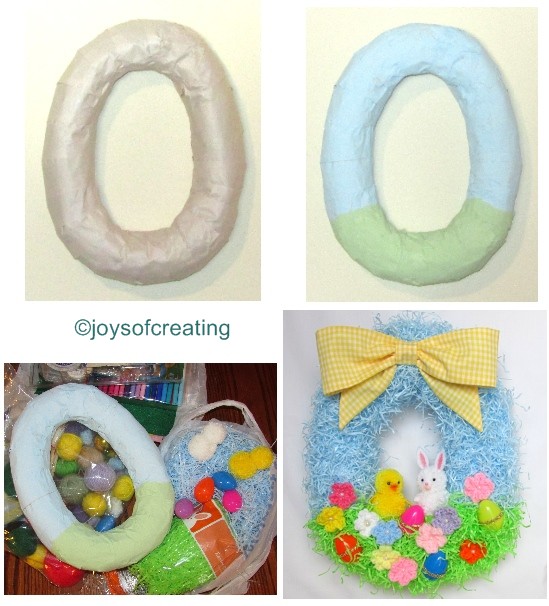
When I started making the wreath base by twisting newspapers and forming them into a circle it looked kind of oval shaped. Mmmm, Then inspiration took over and instead of fixing it and making it a nice and round, I kept it and finished making it into an egg shaped base. I really liked the way it looked.
I painted the base in light blue and light green to help give more color to the Easter grass and to hopefully lessen any gaps or thin spots the grass may have.

I had a great deal of fun making the pom-pom critters. It reminded of an Easter when my son was a toddler. I made pom-pom chicks for all my nieces and nephews. The kids really loved them.

I crocheted the little flowers and added a pearl bead for the center.

For the eggs, I had some left over plastic ones from years past. I thought they needed a bit of glam so I took some gold trim and hot glued it around them.

It was an easy choice to add a bow in yellow gingham. It’s kind of like the sun shining above the bunny & chick enjoying an Easter celebration.

This wreath is about 14 inches tall and bigger than my other wreaths.

My husband likes it alot. He says it looks like an Easter window display for a store.
My Bff loves the wreath and said, it’s the cutest wreath she’s ever seen.
I personally am pleased as peaches with it. 😉

What do you think? Is my wreath too busy or about right?

Wishing you all sunshine and joy all month long.
Happy April!
🙂

eastall

~*~
Here’s why I’m making a ‘Wreath of the Month’ for every month of 2014.
~*~
3-spcbg

Loom Knit Kitchen Scrubbies

IMG_7454
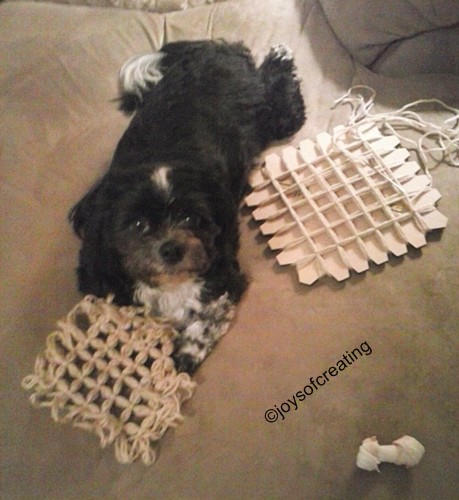
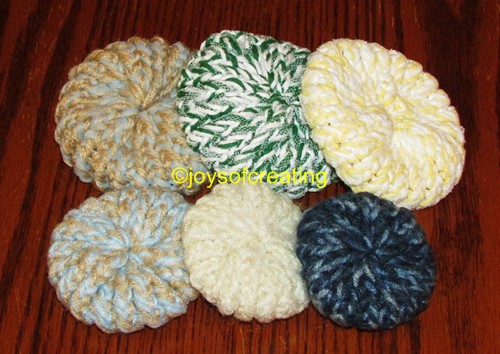
Last month my Bff called me to tell me a very helpful hint she discovered: use a scrubby to wash potatoes with.
I love this idea and have used it ever since.

IMG_8189
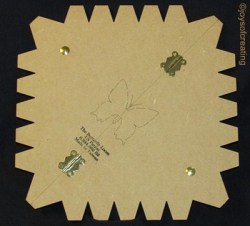
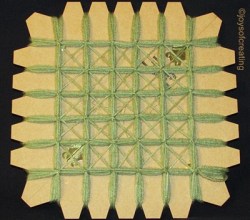
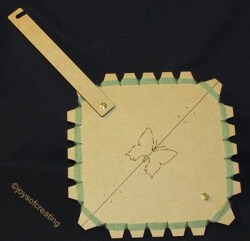
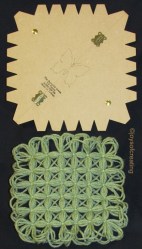
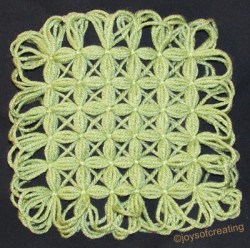
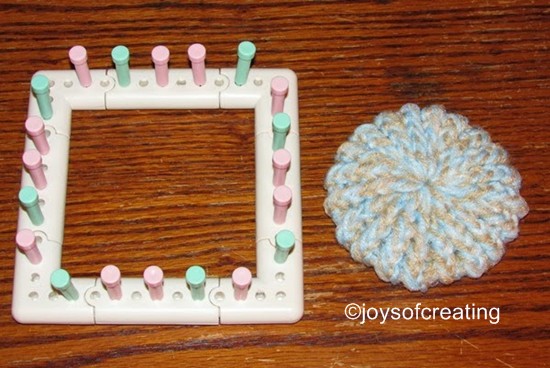
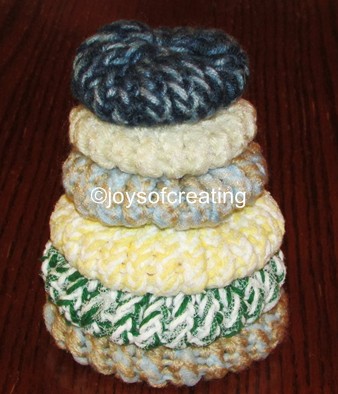
Back in the winter my Bff gave me some nice size scrubbies. They’re bigger than the ones I make. So, she told how many pegs and which loom she used.
I’m so glad she helps me. We have so much fun discussing looming and sharing our projects and ideas with each other.

“Thanks so much my Dear Bff,
Your scrubbies are great and your idea to use them as vegetable scrubber is wonderful.
I’m happy to share your hints with my blogging buddies and readers.” 🙂

I thought I’d make a bit of a tutorial to show how I now make bigger scrubbies.
I use regular 4 ply acrylic yarn and tulle to make my kitchen scrubbies.

My terminology may be off. I can’t find the right words sometimes. 😉
Also, this tutorial doesn’t explain how to loom knit, but is written for folks who already know the basics of loom knitting.
If you’d like to take up loom knitting, here’s a link to a youtube.com search results for ‘How to Loom Knit’ It has oodles of videos of most anything you’d need to know to get started loom knitting.

And here we go…

Kitchen Scrubbies
knitting loom
knitting hook
Tulle (or some type netting)
Yarn (I use 2 strands of acrylic 4 ply yarn)
Large Darning Needle

Cut the netting in 1 1/2 inches wide strip about 12 to 15 yards long.
Wind the strip of tulle into a ball.

*Leave about a 12 inches yarn/netting strip to weave in to use as a drawstring when you’re finished.
Or use a drawstring cast-on.
Hold yarn and netting strip together and cast them on the loom in your favorite fashion.
*I use a regular e wrap cast on.

Using E wrap, knit 12 to 15 rows.
*I usually just knit until there’s about 12 inches of the yarn/netting strip left.

To bind off, thread a darning needle with the yarn/netting strip and feed it through the loops as you take them off the pegs. Continue until the scrubby is off the loom.

Pull the the yarn/netting strip drawstring tight and tie off

Weave the beginning 12 inch strip of yarn/netting strip in and out of the edge stitches making a drawstring.
Pull tight and tie off.

I generally thread the strip through the scrubby and tack it to the other side to secure it in place.

The 5 1/2 inch blue knifty knitter loom makes about a 4 inch scrubby.
scrubbet

IMG_8180
I make smaller scrubbies using a Martha Stwart square loom with 20 pegs.
mslm

A Scrubby is another handy item that can be made from left over yarn.

—–
Further Resources:
Here’s a link to a tutorial for Scrubbies.
There’s a few differences between it and mine. Go and check it out, it may be a more understandable and a better method for you if you’re interested in loom knitting a scrubby.


edited in 1-15-2019 – hopefully helpful info:
PVC Pipe Knitting Loom Stands


PVC Pipe Knitting Loom Stands – with lengths for various looms


Just Hanging Around (clippy hanger hints)

1-hngr
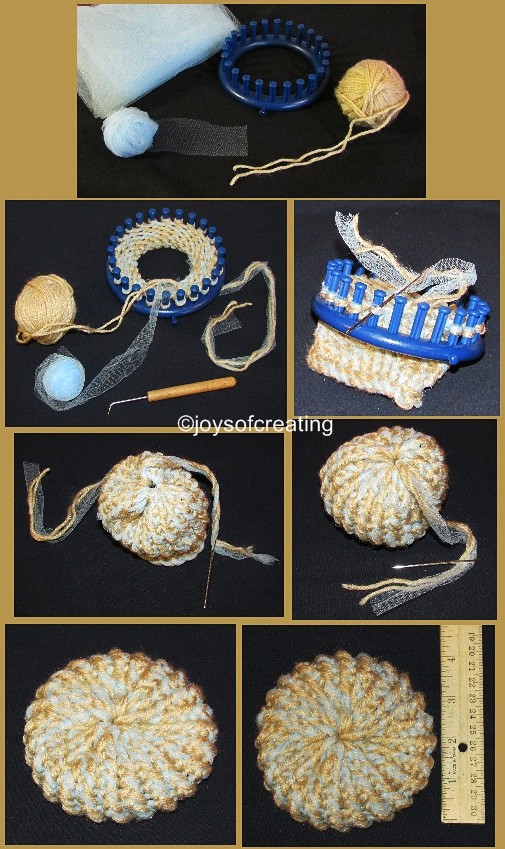
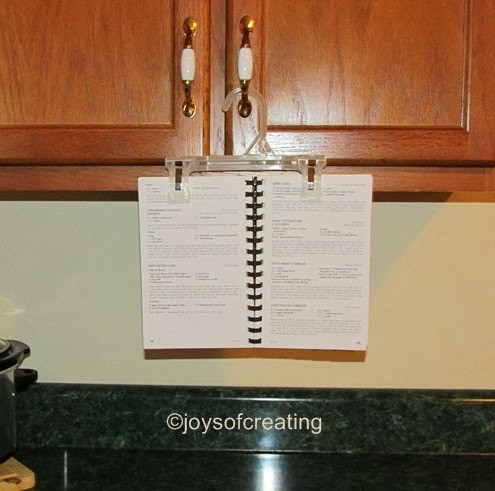
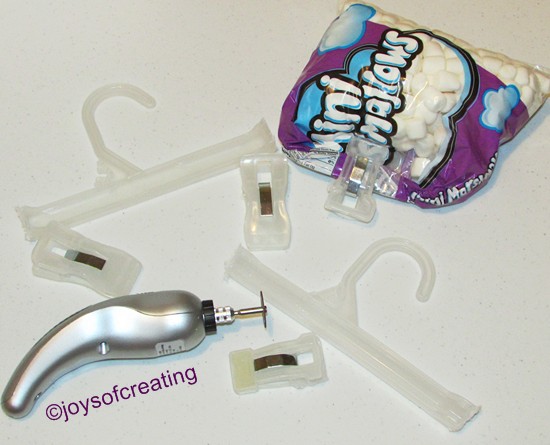
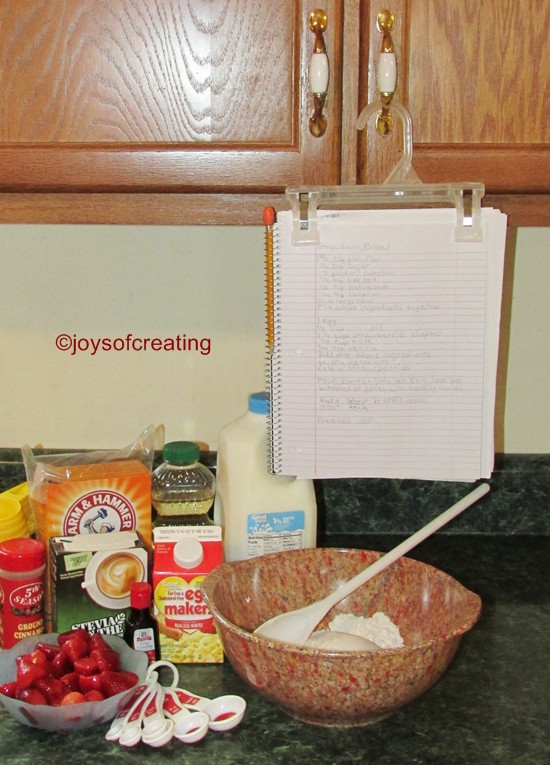
Yesterday I gathered ingredients together to make a loaf of strawberry bread.  I set my recipe & stuff up like I always do and then it occurred to me that I wanted to make a post about a few of my favorite hints for re-using/recycling clippy hangers or pant hangers.

These are not my ideas and they’re not new ideas. You may have seen them or read of them before. I still want to share them since they’ve been a help to me.

I’m very grateful to clever folks who shared these hanger ideas on the web. I surfed around and tried to find the earliest posting of these hints on the web. I posted the links and dates with the hints. (If you know of an older posting, let me know and I’ll edit it in.)

Now without further ado, here’s a few clippy hanger hints.
~*~

Use the clippy hanger as a recipe book holder. Just clip it on the book and hang it from your cabinet door.
It keeps the book off the counter and helps to allow more counter space to use for making foods.
I really enjoy this hint. I use it alot.
2-hngrThe hanger cookbook holder – February 06,2009
~*~

Cut the clips off the hangers and use them for bag clips or like clothes pins, paper clips, chip clips or clips to help hold things together in crafts, such.
I tried and failed miserably to cut the clips off with huge industrial scissors and with a wire cutter. My compliments to whoever designed the hangers, they are super sturdy and hard as the heck to cut. I didn’t have a saw, so I used my craft drill to cut the clips off with it.
I really like having these inexpensive clips, they’re super handy to clasp on to a bag or hold a craft together or papers together. There’s so many uses for them.
3-hngrUnexpected chip clip – August 19, 2009
~*~

Cutting the clips off the hanger came from a forum and as I read further down the thread, someone suggested putting magnets on the back of the clips for refrigerator clips. There was mention of how to decorate them, but I chose to wing-it and do it my own way.
flwrlmI got out my flower loom and made a flower. I intended on having one simple flower on the clip… well seeings how it’s the unwritten duty of a crafter to over embellish, whenever the opportunity is there, and I take my crafter duties seriously, I made a couple more flowers and crocheted 4 leaves. I’d of added more, but I ran out of room on the clip. lol It’s quite cheerful looking and I’m surprised happy with the gawdy fun results. (I may decorate my recipe book hanger too. )
flwrs01  Refrigerator clips – August 19, 2009
~*~

I think those hints are clever ways to recycle and reuse clippy hangers. I used the leftover part of the hangers to hang up a couple plastic bags of craft supplies in the closet. Storage space is dear in my craft room and I’m always happy to figure out new ways to hoard store supplies.
I’m fortunate to have dozens several of these hangers on hand from buying clothes for my grandson over the years.
I’ve given several away while passing on the hanging recipe book hint. My grandson really got a kick out of that idea and even took a couple hangers home to his Mom to show and give to her. I love that he enjoys sharing fun helpful ideas. He’s such a sweetie.

Next time you have some extra clippy hangers laying around, I hope you’ll consider giving one of these hints a try.

Do you know any helpful for re-using or recycling hangers? You’re welcome to share them, if you want.
Here’s hoping that you’ll have an enjoyable rest of the week hanging out waiting for warm weather.

🙂
spcr1

Shelibean my craft tester – Butterfly Loom

0222141931a
Last November my Bff surprised me with a special gift of a ‘Butterfly Loom’. She has one and makes beautiful motifs for a coverlet she’s making.
I’d never tried to use the loom. I wanted to try to make motifs, but I was afraid I couldn’t do them right. The other night I was surfing around youtube and looking at some craft videos and happened on a beginners video for the ‘Butterfly Loom’.
I watched it and realized that perhaps I could make butterfly loom motifs too.
When I got the loom out and sit down on our sofa, Sheli started sniffing the loom and tried to take it from me.  So being the obedient human I am, I gave him the first motif I made. When I was working on my second motif I noticed Sheli was napping with his head laying sweetly on his new motif. I tried to sneak around and take his photo, but he roused up and made an even cuter pose. I apologize for the quality of photo, I took it with a cellphone.
Seriously, it does help me to test the strength of a yarn project to give a sample piece to Sheli. He’s goes at his job of tester with gusto and seriousness. He chewed, pulled, tugged, tossed and chased the motif and it held up real well, so far, Which really surprises me considering the way the motifs are made. Just yarn wound around the toothed edge and knots tied at the meeting points.

Here’s a gallery to give you an idea of the Butterfly Loom.

I’ve made a few motifs and am getting better with each one. I’ve an idea as to how I want to use them. Hopefully, my idea will work out and if it does I’ll post a photo of what I make with them.

The weekend was really nice. The temperatures were comfortable, the sun was shining and we even opened a window or two. My husband painted our utility room. I did a smidgen of Spring cleaning in my craft room. Unfortunately the nice weather has passed. It cooled off alot during the night and our temperatures are forecast to drop way down and we may even get a dusting or two of snow this week. It’s now what we used to call pneumonia weather. Hopefully the cold front won’t last and we’ll get back to the business of warm weather and plans to enjoy the great outdoors.

I hope you all had an enjoyable weekend
and will have a wonderful week.

🙂


edited in: 4-5-2018
The other day I recieved an email via my contact form asking about where I got my butterfly loom.
I couldn’t remember where I got mine, so I asked my BFF and she said she got them from ebay. I sent a reply and said I got mine from ebay. (What I should have said was mine was a gift but came from ebay. I’m forgetful in my old age. :/ )
After I sent the reply, I went on an internet search to try and find places other than ebay that sells them.
I’ve searched, as much as my limited knowledge of the internet allows, and I found only ebay and one other website that sells butterfly looms.
I’m adding a link to the butterfly loom site on this post.
If you know of another place that sells butterfly looms, let me know in the contact form and I’ll add the link here on this post.

ButterFly Loom – https://www.butterflyloom.co.uk/


Strawberry Redwork Block

IMG_6763

In honor of my successful Strawberry Bread
I thought my Strawberry Redwork Block was perfect for my weekly block.

Here’s wishing you all a successful sweet rest of the week!

🙂

spcr1