 Wishing you all a warm weekend!
~*~
CherryWillow’s ‘No-Filter Friday’; post a photo on Friday that you’ve taken that has only ‘sizing and adding a copyright’ being the only editing/filtering done to it.
.
 Wishing you all a warm weekend!
CherryWillow’s ‘No-Filter Friday’; post a photo on Friday that you’ve taken that has only ‘sizing and adding a copyright’ being the only editing/filtering done to it.
.
“This week, show us something you appreciate
despite —or even because of — its short shelf life.”
~*~*~*~*~*~*~*~*~*~*~*~*~
I appreciate snow and icicles as long as they’re temporary.
We haven’t had a major snowfall in awhile, so
I went through my photos in search of snow and ice.
These 2 photos are a couple of my favorites from 2010.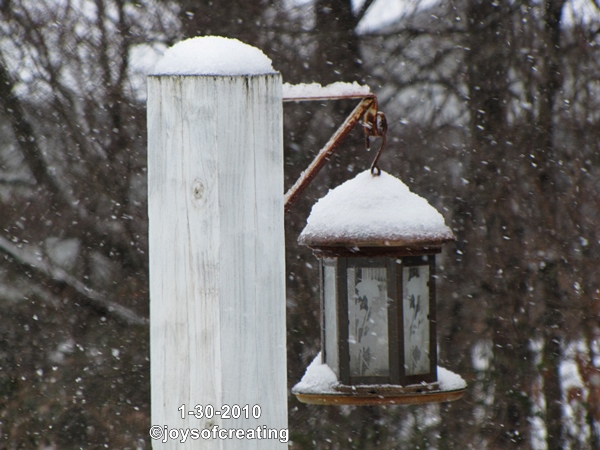

Wishing you all fun with the WP photo challenge!
.
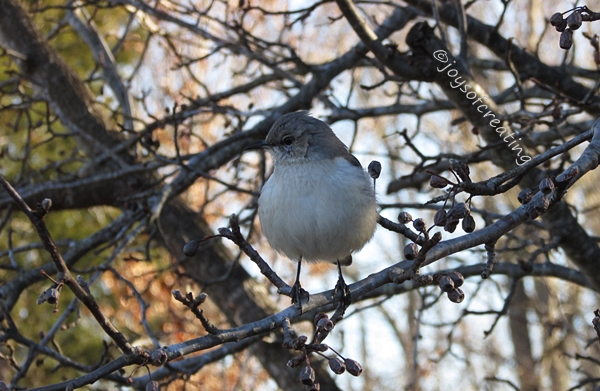
This is our resident mockingbird.
It’s like a round glowing like when the sun hits it’s chest feathers.

Sorry about the low quality of this photo.
I tried to take a photo through our kitchen window of our
resident mockingbird sitting in an ice covered tree 2-17-2015.
Wishing you all a warm & happy Wednesday! 

 Let me start off with a disclaimer: I realize that there’s regions snowed totally under and you are free to snicker at my snow & ice photos. My warm postive thoughts are with you all.
  Please remember though, that for us, this below zero icy cold snowy weather is still miserable, dangerous and beautiful.
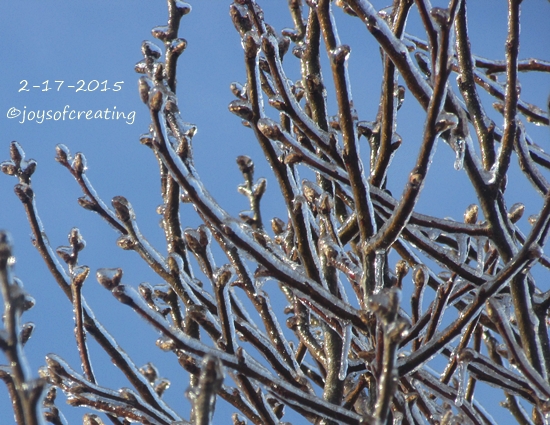 It iced earlier this week and it’s snowed for a couple of days. I find it a bit ironic how I started buying seeds and posting about deciding to have a garden this year and then this crazy weather hits… ~bummer~
Our electric and internet has been blinky, I’m working on crafts and trying to keep myself distracted from not being able to blog or surf and stuff.
I wanted to try and make a post to let you all know that I’m still around. I’ll be by to visit and comment whenever I can.
I hope you all are keeping warm and safe during these freezing days of winter.
Updated 7-14-2017
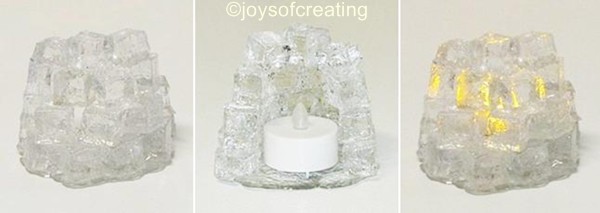
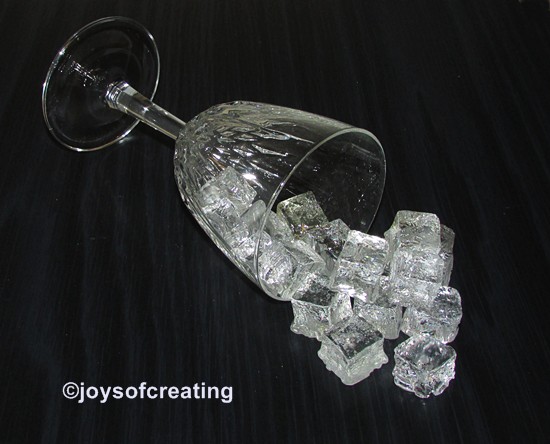 I learned how to make ‘fake ice cubes’ by melting clear pony beads.
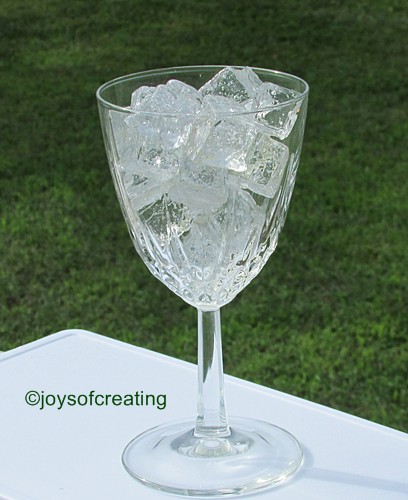

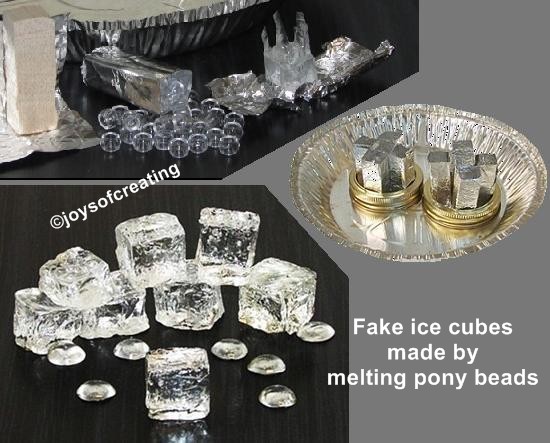
There’s a few things I adjusted, added or did different.
*I used balsa wood to make my ice cube form.
*Keep the area well ventilated: I opened my windows and turned on ceiling fans and ran the stove-hood fan.
*Apparently my oven doesn’t heat as hot as the author of the tutorial’s does.
I had to bake at 400° to get the beads to melt successfully.
*I also had to bake them longer: I’d put half the beads in the form and bake them for 15 minutes then put the rest of the beads in and bake for another 15 minutes.
*Keep a close eye on these as they bake to make sure they don’t burn.
*Let the cubes cool before trying to unwrap the aluminum foil.
*To give the cubes a shiny finish, after I peeled the aluminum foil off my ice cubes, I trimmed off the shards and rough edges and then put the cubes back on the pan and in the oven for about 3 to 5 minutes. I was careful to watch so they wouldn’t melt too much.
*I took them out of the oven and let them cool.
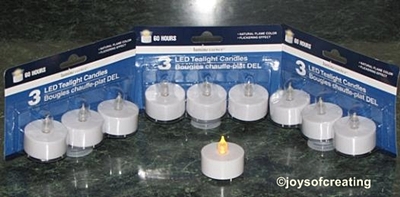 Using a battery operated tea light
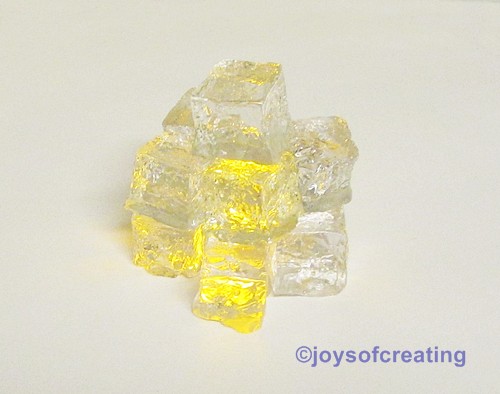
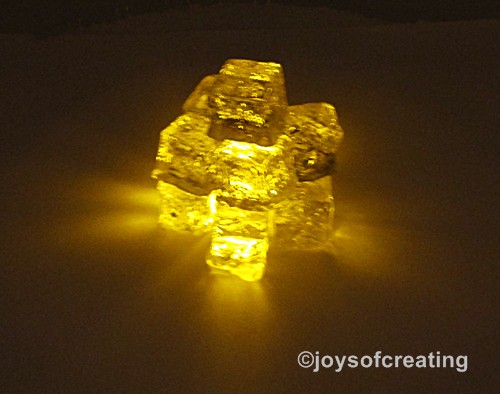
edited in 6-11-2014:
I made this tea light by gluing the fake ice cubes together with E6000 glue.
end of edit…
I apologize for the missing links to the tutorial.
I’ll try to do an update soon. with either my own tutorial or a link to one.
.
