In 2013 when my sister introduced me to loom knitting, my main problem with the loom was the handling of an ongoing project. My wrists would ache and my work would bunch up underneath. It was so awkward for me. I thought I was going to have to quit before I even learned the skill.
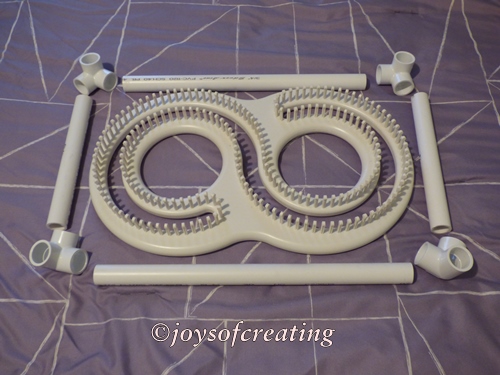
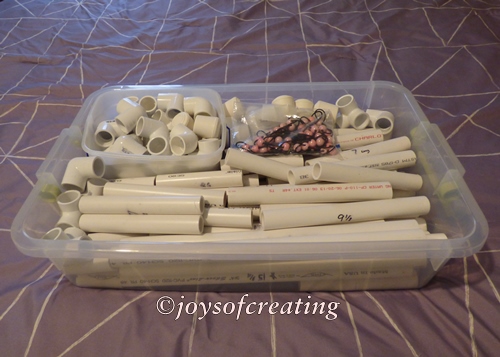
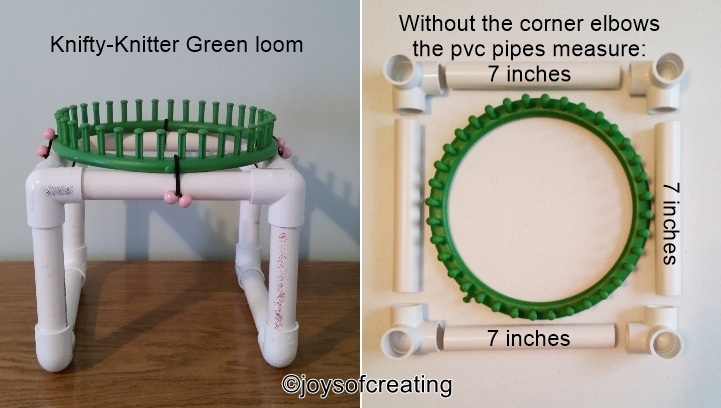
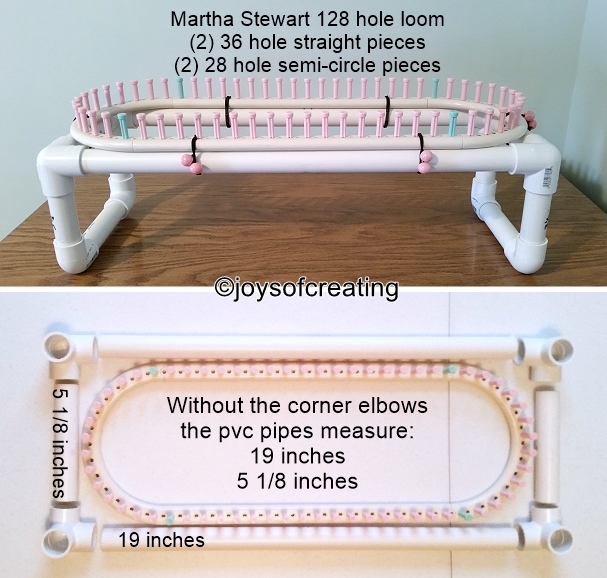
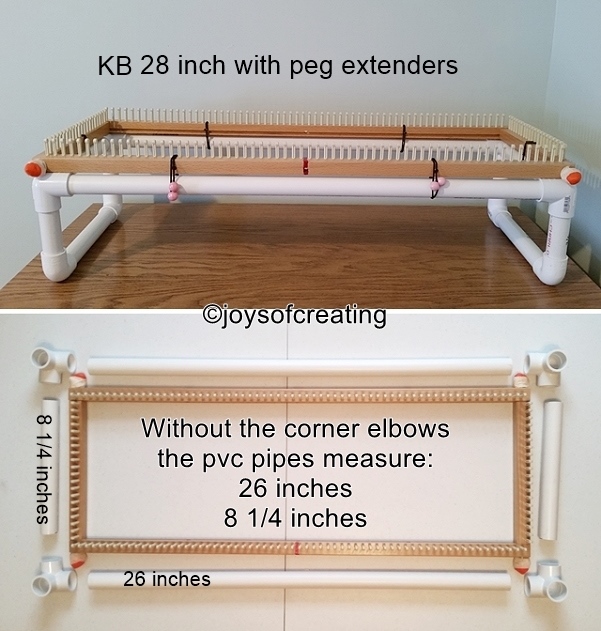
Then I had an idea, a wonderfully helpful idea for an easy way to make reusable frames to fit any size knitting loom: pvc pipe, pvc joints and Ponytail Bobbles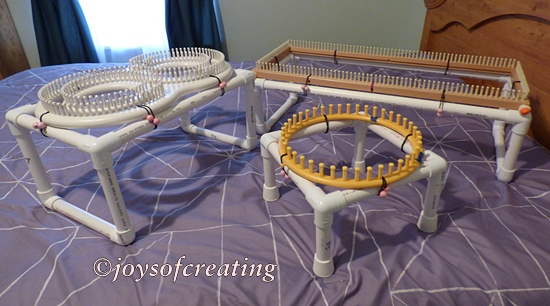
The PVC Pipe is 3/4 inch.
I can make the legs any length I need. I use the stand like a lap tray.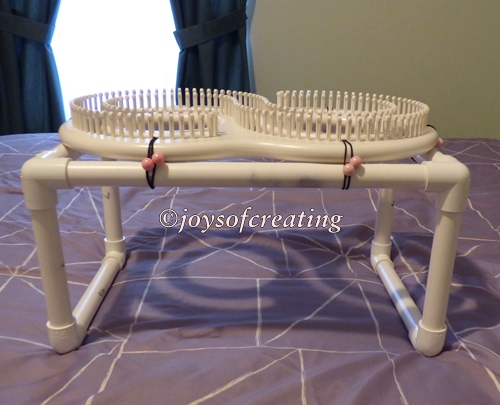
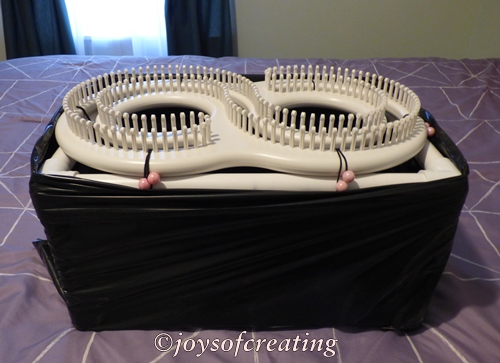
When my knitting project starts getting long, I put a trash bag over the stand and secure it with tape to the frame.
I shared my pvc frame idea with my sister. She loved it and has been using it too ever since.
And there you have it, one more thing that helped make my loom knitting much more enjoyable.
I hope it helps some of you all too.
Happy crafting
It’s been brought to my attention, that some wonderful crafters have made loom stands going by my basic directions. I’m so happy that my design is helpful to hopefully make loom knitting more enjoyable.
However, I worked hard on making the loom stand designs and tutorial.
In exchange for using my designs, if you post a photo of your loom stand anywhere in a group, forum or online, and are asked about it’s construction or how to make it, you’re welcome to post a link back to my blog.
https://joysofcreating.com/
or post a link directly to my blog post:
PVC Pipe Knitting Loom Stands – with lengths for various looms
Thanks so much! Happy Crafting!
edited in 2-10-2019:
I do not glue the stands together.
I don’t use adhesive on the pipes nor couplings.
The reason I don’t glue the pipes and couplings together is that I’m constantly using different size looms and can’t afford to dedicate one stand per each. Nor do I have the space to store them.
For my use, there’s enough suction, when the pipes are pushed securely in to the couplings, to hold them together.
I’ve not had a problem with the pipes/couplings coming apart when I use them.
The suction isn’t tight enough to hold them together forever.
From time-to-time, I check the joints and pipes to make sure they’re still snug, if they feel loose I push them back together.
If you want to dedicate a specific stand to a specific loom for all-time, then gluing it together may be something you might want to consider.
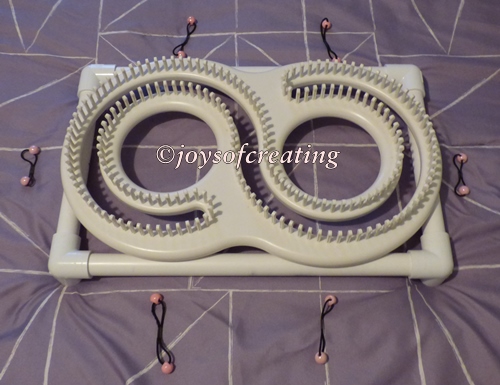
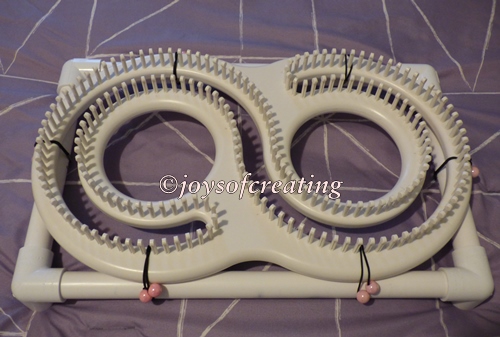
I use ‘Ponytail Bobbles’ to hold the looms on the stands.

Edited in: 9-23-2020
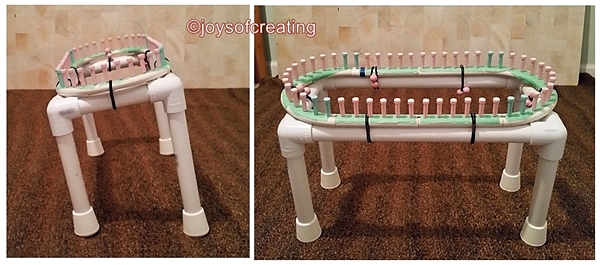
Sometimes I make the loom stand with shorted legs in front to make the loom stand slanted.
The slanted loom stand works well for me for one sided projects like scarves, dishcloths and flat pieces.
I use Chair Leg Caps on the bottom of the pipes because of the sharp or rough edges.
It’s been brought to my attention, that some wonderful crafters have made loom stands going by my basic directions. I’m so happy that my design is helpful to hopefully make loom knitting more enjoyable.
However, I worked hard on making the loom stand designs and tutorial.
In exchange for using my designs, if you post a photo of your loom stand anywhere in a group, forum or online, and are asked about it’s construction or how to make it, you’re welcome to post a link back to my blog.
https://joysofcreating.com/
or post a link directly to my blog post:
PVC Pipe Knitting Loom Stands – with lengths for various looms
Thanks so much! Happy Crafting!

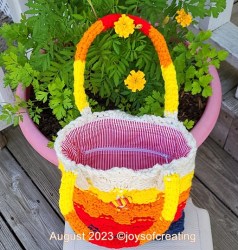
 I’m using the ‘Knifty Knitter’ icord spool loom to make the handles for my Burgundy and Gray Tote Bag. Well, right now, that’s my plan. If they don’t look good, I’ll make some other kind.

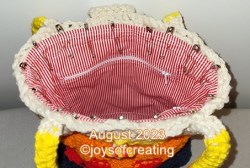
 It has a zipper-pocket on each side inside.
 I’m ever so much happier with my old Bright Tote Bag now.


 Earlier this week we had internet trouble. We bought a new router and thought that would fix the issues. Well, it did for about 24 hours then the issues returned worse than before.