
 My blogging buddy Renee inspired this post. She mentioned that she didn’t know that Martha made looms.
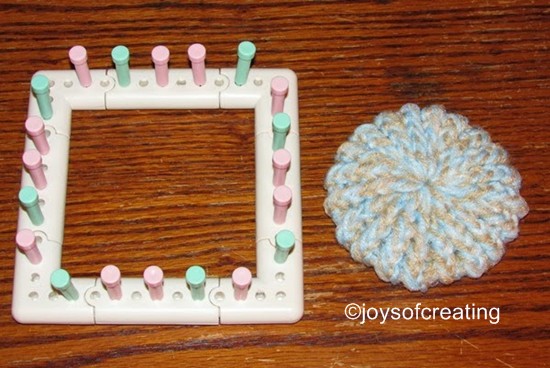
It occurred to me that she may not be alone on that. I figure I should post some photos of my Martha Stewart loom set to show what I talk about so much in looming.
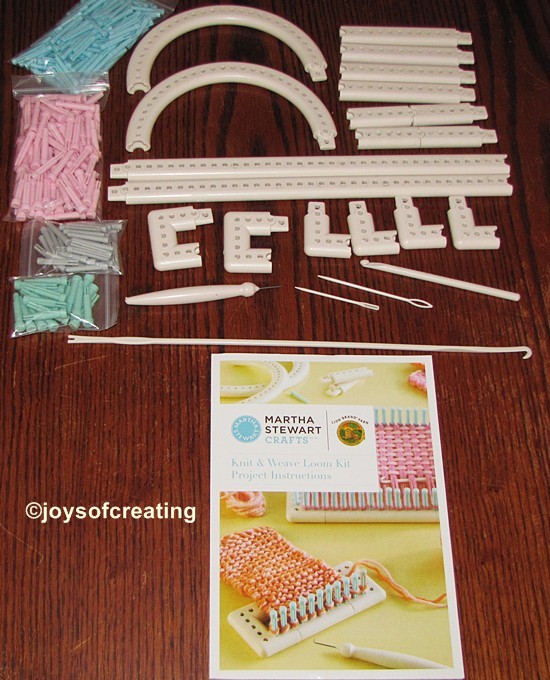 Here’s all the pieces parts straight out of the case.
Pros:
You can weave or knit oodles of stuff in a lot of different sizes.
It’s fun to put together. (Brings back nostalgic memories of tinker toys. 😉 )
Lion Brand web site has info and patterns for the Martha Stewart looms.
Lion Brand – Martha Stewart has a lots of videos on youtube on how to knit and weave with the looms.
The cast on and the bind off was tricky for me to learn at first, so I was thankful for the videos.
Aggrivations:
 The Martha Stewart loom hook isn’t good quality and bends/breaks easily.
I do like the handle of the MS loom hook. I wish they’d put a little more time in the actual quality of the hook part.
Fortunately, I had ordered a Knifty Knitter loom hook and didn’t have to use the MS one for long. The MS hook wire was getting weak and would’ve broken in no time.
I now use a super sturdy loom hook that came with my Kb Afghan Loom, so I am good to go.
 Some of the pegs fit loose and I use painter’s tape to hold them in and some of the pegs fit so tight I carefully hammer them in.
 There’s not a comfortable way to store the pegs in the plastic case of the loom set, oh I could put the pegs in bags and stuff them stuff in the back, but I don’t like that at all. So I bought a 6 pack of little waters that my Grandson happily helped empty. I soaked off the labels and use them to store my pegs in. The little bottles work like a charm.
 I must confess that all-in-all I really enjoy the loom set. In fact I enjoy it so much that I bought a second set. Well, it was on sale and I thought if I had a second set I could put the parts together with my first set and knit or weave some really big stuff. lol Also I can have more than one project going at once. I haven’t used my second set yet, but I have it if I ever take a hankering to use it. 😉
This is all for me at the moment.
I hope you all have a fabulous Friday
and a wonderful weekend.
🙂

 Last month my Bff called me to tell me a very helpful hint she discovered: use a scrubby to wash potatoes with.
 Back in the winter my Bff gave me some nice size scrubbies. They’re bigger than the ones I make. So, she told how many pegs and which loom she used.
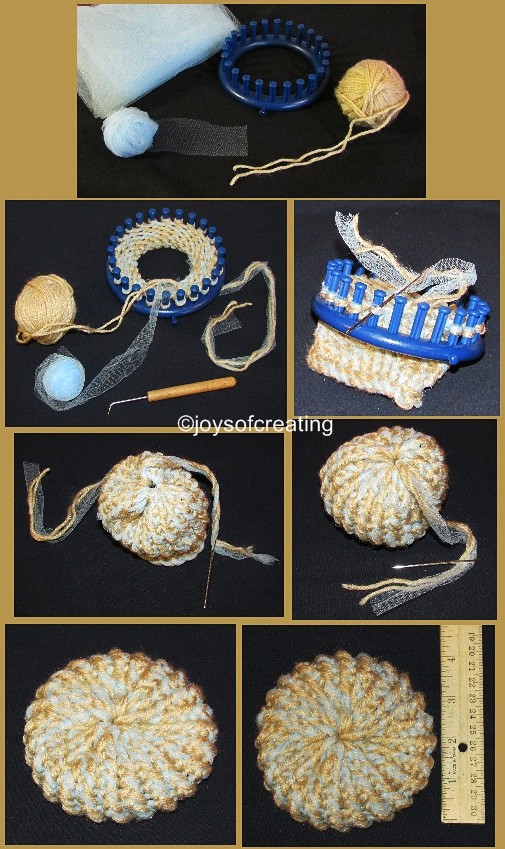

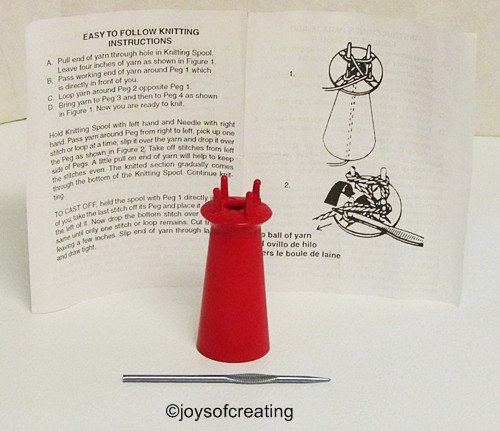 The other day while I was looking through my old sewing box, I found this cool little Boye Tube Loom. I must of had it for 30 years, so I guess that makes it vintage. I had never used it and don’t remember where I got it. I have, however, used the metal knitting needle that came with it as an important part of my sculpting tools since I first began sculpting 9 or so years ago.
 I knitted a short cord with it. It’s okay, but it’s major flaw is that Boye could’ve made the pegs an 1/8 of an inch longer and it would’ve been an awesome little tool.
 My above photo is some of my left over yarn wrapped around clothespins. I did this to show that I think it’s a neat idea. This idea could be used for embroidery thread, yarn, ribbon, twine or most anything stringy to help keep them neat and tidy.


 I got frustrated at first with the skein tumbling and capturing everything including the attention of (our dog) Sheli. He and I got into a bit of a kerfuffle for a few seconds.
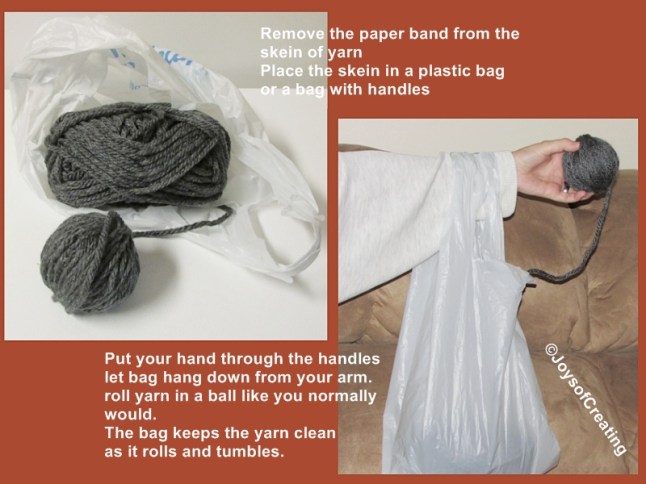
 Anyway, this was a pretty good experiment because now if I want to make an blanket of granny squares out of bulky yarn, I can better guess how much yarn I need.