

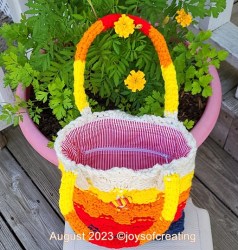
I’ve finished another project from my sewing project bag. I made a new liner for a tote bag that I made back in 2013. This Bright Tote Bag was the first big loom knit project I made. I used a Martha Stewart knitting loom. I single-crochet-chained every inch of yarn I used. It took a long while, but it was really enjoyable and worth the effort. Making this tote bag project helped me better my loom knitting skills.
The stitch pattern is what I call a ‘basket-weave’. I’ve heard it called a tile stitch and a cobblestone stitch. Doesn’t matter what it’s called, it was a fun stitch to do. I think it looks pretty good for my no-pattern first attempt at a loom knit project.
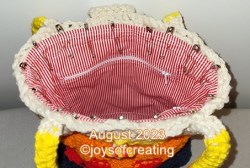
I’ve always liked the look and colors of this tote. I’m happy with the beads and oblong toggle button, both of which I sculpted out of polymer clay.
However, I never liked my open-pocket lining (lower left side of the collage-photo). Since I’ve figured out the method for setting zippers in the pockets in linings, I decided it was time to replace the lining in my old Bright Tote Bag.
 It has a zipper-pocket on each side inside.
One side zipper-pocket is big enough for my 8-inch kindle fire and the other side pocket is big enough for a mobile phone and some other small stuff.
 I’m ever so much happier with my old Bright Tote Bag now.
Wishing everyone a happy week of sunshine and smiles.


 It seemed an easy craft, but I didn’t have any floral tape nor a small clay pot. I thought about it for a second and realized that I could use polymer clay to wrap the pen in and sculpt a clay pot and stone fillers.
 I was going to put some green raffia over the top of my sculpted stones for fake grass, but I liked the look of the stones and decided not to cover them up.
 I’ve been in the mood to try my hand at painting a picture. Painting pictures isn’t something I ever spent much time on. I planned to make an all-painted 8×10 picture of looking out of a window and seeing a snowman. Simple, right?…
 For today’s No-Filter-Friday, I took a photo of my craft-in-progress.
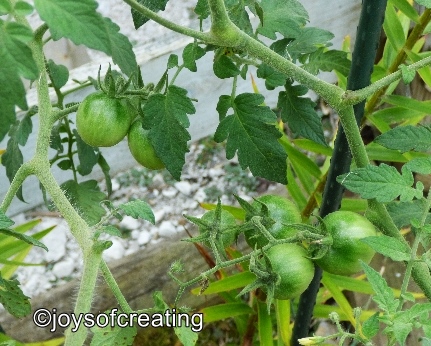 Late in the gardening season, I noticed one lone little volunteer tomato plant growing in amongst my tiger lilies. I decided to let it grow. It’s a tall leggy vine and only started branching out when it grew as tall as the lilies. It had a few blooms, but never developed tomatoes until a couple weeks ago. Now it has about a dozen cherry tomatoes on it.
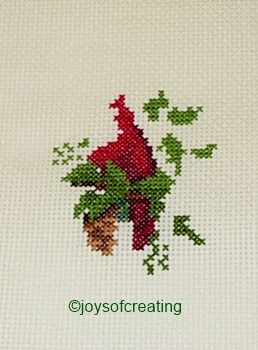 I haven’t progressed very much on
  and then it came to me, have several colors threaded on other needles ready for the color changes.
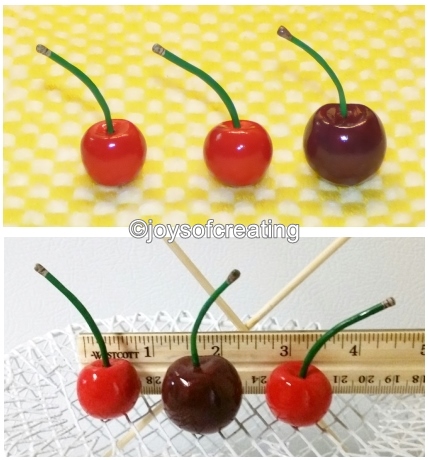 I’ve done a small bit of polymer clay sculpting recently. I sculpted 3 cherries of 2 different varieties. They turned out really pretty.