 Today I’m going to start having ‘Flashback Fridays’ each week where I’ll re-post a craft or something from my old blog ‘Enjoyingcreating‘. I have several crafts and things from it that I think would be fun to share again here on my new blog. Plus, this gives me another opportunity to keep my blog active.
I hope you all will enjoy seeing my crafts and things from years past on my ‘Flashback Fridays’ postings.
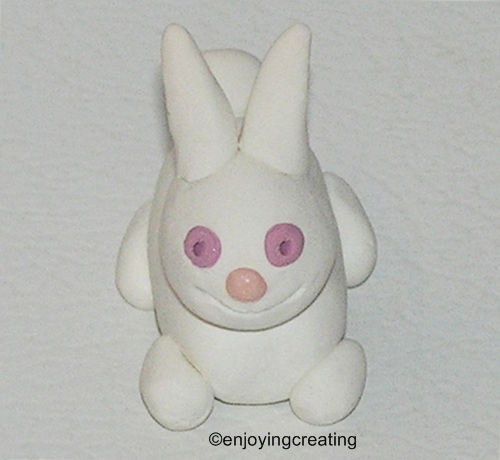
To start my ‘Flashback Fridays’, since we’re in the early throws of Spring and Easter is coming up soon, I decided to post my ‘Bunny Sculpt tutorial’.
This little bunny is about 2 1/4 inches long when it’s finished. The photos make it look bigger. It’s cuter in real life.

Let me know if you or your children make a bunny by this tutorial. And be sure to take some pictures too. I’d love to see your creative little bunnies.
I originally made this tutorial for polymer clay, but you can use homemade clay or air-dry clay.
~*~
If you use air-dry or homemade clay, please remember to ignore the baking instructions.
~*~
Bunny Sculpt Tutorial
~Adult supervision is required~
Supplies:
polymer clay or an air dry clay
a toothpick
 .
.
.
.
Make the following pieces:
1 – 1 1/2 inch oblong ball of clay for body
1 – 1/2 inch round ball of clay for head
4 – 1/4 inch small oblong balls for feet
1 – 1/4 inch round ball for tail
2 – 1/2 inch cone shapes for ears
.
.
.
.
.
 .
.
.
.
Press the clay in place as follows:
1/4 inch round ball on one end of the oblong body.
1/2 inch head ball at the other end of oblong body.
4 small oblong balls in feet positions.
2 cone shapes on top of head for ears
 Next you need:
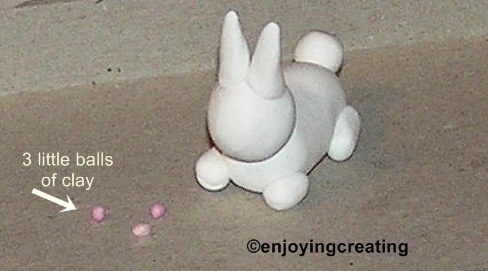
1 tiny light pink ball of clay
2 tiny dark pink balls of clay
Press the clay in place as follows:
2 dark pink clay balls in eye positions
1 light pink ball in nose position
Take a toothpick and draw a smile
and dent the eyes to make pupils
~*~
If you’re using air dry clay, you’re finished.
Set your Bunny sculpt somewhere safe and let it dry.
~*~
If you’re using bakeable clay then go to the next steps.
 .
.
.
Before baking,
Pierce the body underneath to allow
clay to bake thoroughly so it won’t
crack or poof or something.
Bake the polymer clay bunny at the manufacturers recommended temperature and for the recommended length of time.
Allow bunny to cool before touching.
.
.
Tah – dah, you’re done and have a wee little bunny figurine.

I hope you all enjoyed my Flashback Friday.
It was fun sharing my bunny sculpt with you.
It’s always been one of my favorite sculpts
because it’s simple and makes me smile.
Here’s wishing you all a hoppy good weekend!


 To all the Dad’s & Caregivers of our children


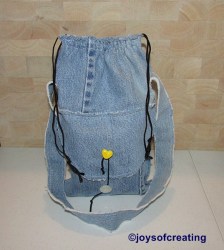
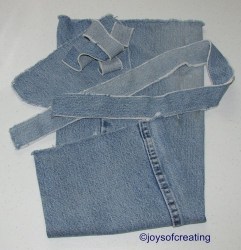
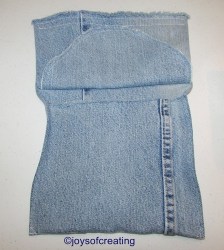
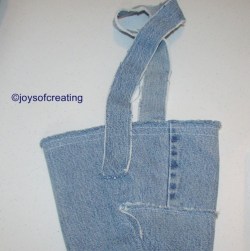
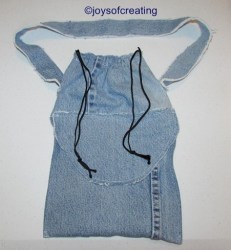
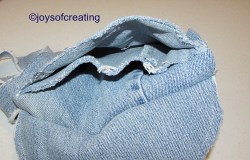
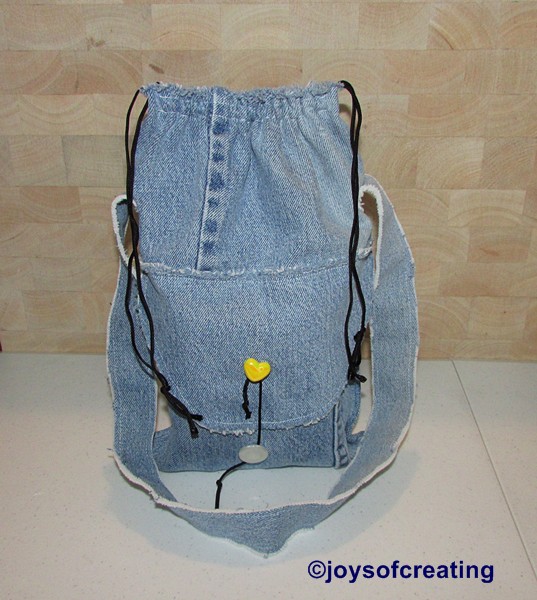 I needed a tote for my water that I carry to the garden, on walks or short trips away from the house. I wanted something simple that also had small pockets for keys and little things like that. I studied on it awhile and came up with a pattern using a pair of may husband’s old worn out blue jeans.


 Looks like there’s going to be a new fawn in the neighborhood in the next few weeks. This doe and a young buck came strolling across our land. I wasn’t fast enough to get a good photo of the young buck, but I did manage to get this fairly good photo of the doe. She’s a really good size deer. I hope she’ll bring her baby by sometime. and I hope I can get photos of it.
 Every time I step out of the door I’m greeted with the sweet aroma of honeysuckle. It’s really spread alot more this year than previous years. It must’ve been a perfect winter for it to flourish.
 I’m trying to make a project using these colors, but so far I have had to salvage two attempts. Sooo, maybe it’ll be 3-times-charm and I’ll actually get my project finished and can share it here soon.

 Wishing everyone a Safe & Pleasant