
Last November my Bff surprised me with a special gift of a ‘Butterfly Loom’. She has one and makes beautiful motifs for a coverlet she’s making.
I’d never tried to use the loom. I wanted to try to make motifs, but I was afraid I couldn’t do them right. The other night I was surfing around youtube and looking at some craft videos and happened on a beginners video for the ‘Butterfly Loom’.
I watched it and realized that perhaps I could make butterfly loom motifs too.
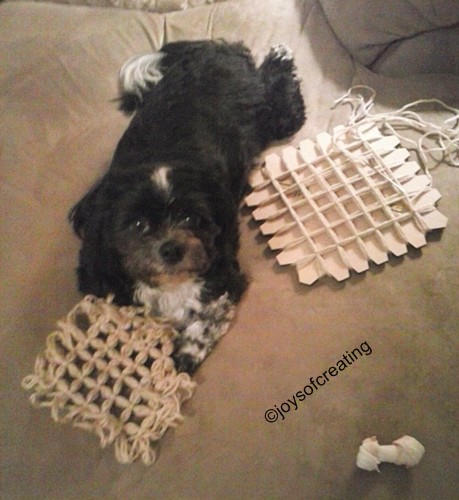
When I got the loom out and sit down on our sofa, Sheli started sniffing the loom and tried to take it from me. So being the obedient human I am, I gave him the first motif I made. When I was working on my second motif I noticed Sheli was napping with his head laying sweetly on his new motif. I tried to sneak around and take his photo, but he roused up and made an even cuter pose. I apologize for the quality of photo, I took it with a cellphone.
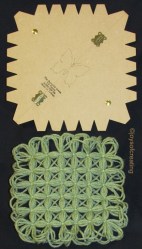
Seriously, it does help me to test the strength of a yarn project to give a sample piece to Sheli. He’s goes at his job of tester with gusto and seriousness. He chewed, pulled, tugged, tossed and chased the motif and it held up real well, so far, Which really surprises me considering the way the motifs are made. Just yarn wound around the toothed edge and knots tied at the meeting points.
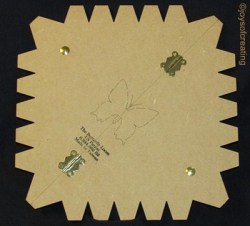
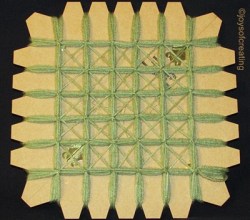
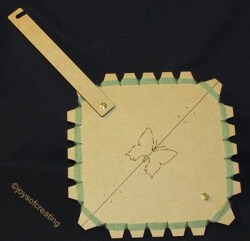
Here’s a gallery to give you an idea of the Butterfly Loom.


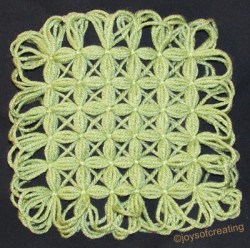
I’ve made a few motifs and am getting better with each one. I’ve an idea as to how I want to use them. Hopefully, my idea will work out and if it does I’ll post a photo of what I make with them.
The weekend was really nice. The temperatures were comfortable, the sun was shining and we even opened a window or two. My husband painted our utility room. I did a smidgen of Spring cleaning in my craft room. Unfortunately the nice weather has passed. It cooled off alot during the night and our temperatures are forecast to drop way down and we may even get a dusting or two of snow this week. It’s now what we used to call pneumonia weather. Hopefully the cold front won’t last and we’ll get back to the business of warm weather and plans to enjoy the great outdoors.
I hope you all had an enjoyable weekend
and will have a wonderful week.
🙂
edited in: 4-5-2018
The other day I recieved an email via my contact form asking about where I got my butterfly loom.
I couldn’t remember where I got mine, so I asked my BFF and she said she got them from ebay. I sent a reply and said I got mine from ebay. (What I should have said was mine was a gift but came from ebay. I’m forgetful in my old age. ![]() )
)
After I sent the reply, I went on an internet search to try and find places other than ebay that sells them.
I’ve searched, as much as my limited knowledge of the internet allows, and I found only ebay and one other website that sells butterfly looms.
I’m adding a link to the butterfly loom site on this post.
If you know of another place that sells butterfly looms, let me know in the contact form and I’ll add the link here on this post.
ButterFly Loom – https://www.butterflyloom.co.uk/
 My above photo is some of my left over yarn wrapped around clothespins. I did this to show that I think it’s a neat idea. This idea could be used for embroidery thread, yarn, ribbon, twine or most anything stringy to help keep them neat and tidy.


 I got frustrated at first with the skein tumbling and capturing everything including the attention of (our dog) Sheli. He and I got into a bit of a kerfuffle for a few seconds.
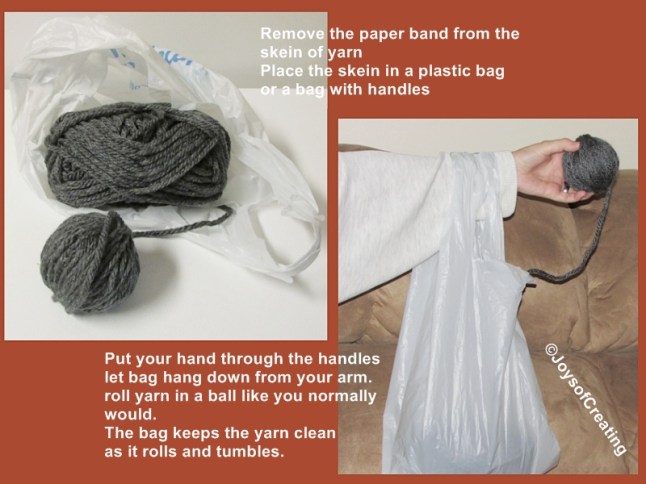
 Anyway, this was a pretty good experiment because now if I want to make an blanket of granny squares out of bulky yarn, I can better guess how much yarn I need.