2015 WP Weekly Photo Challenge – ROY G. BIV

2015
WordPress Weekly Photo Challenge
~ROY G. BIV~

When our Grandson, was old enough to climb out of his playpen, we bought him a new twin size bed. We set it up, put on new sheets, but we didn’t have a comforter set for it yet.

I immediately wanted to make a quilt for the bed. My Mom was always quick to make new quilts for new beds or new folks. It took me a couple of days to search for a pattern and I didn’t like any of the ones I found. In the tradition of my Mom,  I sat down and designed my own special pattern for our Grandson’s quilt.

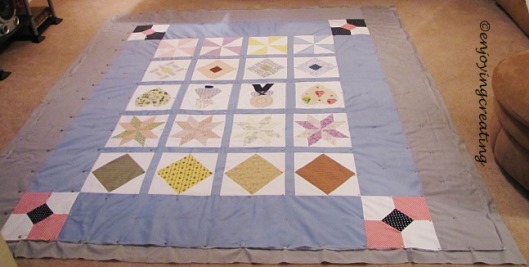
I decided to go with a lake theme in honor of all the fishermen in our families. The fish are all the colors of the rainbow except blue. I decided to use the blue for the background representing a water in lake.

I was amazed at how easily my pattern went together. It turned out quite well.

Here’s the picture of the quilt top before I quilted it.
rainbowlake1lgI think Every special quilt needs a story with it and here’s the one that I made up for our Grandson.
The pinwheels in each corner represent the propeller of a boat.
In the 1st boat is Grandson and his Dad (our son)
In the 2nd boat is Grandpa & Grandma (me & my husband)
In the 3rd boat is his Mom and other Grandparents (his Mom’s parents)
In the 4th boat he could pretend that anyone he wanted to be in it. Sometimes he chose his sometimes his cousins, sometimes his friends, sometimes the power rangers, sometimes his aunts and/or uncles. His favorite was when he pretended that his and our puppy dog and/or kitty cat was in it. lol

The story line took on many different aspects and adventures as our Grandson got older, but basically the story is:
The quilt story is ‘Rainbow Lake’. We all are in our boats on a fishing trip. We have a wonderful time and our Grandson always catches all the fish. 😉

I know it’s a simple story and some folks might find it quite silly, but it has always been such fun watching and listening to our Grandson pretending about our imaginary fishing trips.

Back to my mention of our planning to take our Grandson shopping for a comforter set for his new twin size bed, well, he loved the Rainbow Lake quilt so much that he didn’t want a store bought comforter. I was so surprised and tickled pink. It sure did my heart good to see him so happy about a quilt that I made for him.

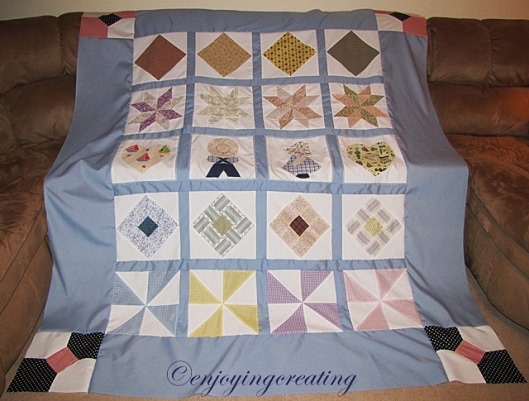
Here’s the quilt set all finished.
rainbowlake2lg
I quilted the quilt on my sewing machine.
I used a low pile poly batting.

I made the dust ruffle a darker blue because the water in a real lake seems darker near the bottom. I made the pillow sham the same color as the dust ruffle to pull the set together, so-to-speak.

The set washes up beautifully.
It’s been washed regularly over the years and it’s colors has held up wonderfully.

It’s been about 12 years since I made the quilt and up until this past weekend, our Grandson still didn’t want a store bought comforter set… even though we’d put a full size bed in his room a few months ago and gave his twin to his little cousin. He still loved the quilt and the story that goes with it. I kept the quilt on the bed as a comforter even though it was way too short on the sides and looked quite goofy.

After much searching, I found a full size comforter that I thought our Grandson might like. It’s solid gray with geometrical lines and has matching striped sheets. I gave it to him this weekend and he was quite pleased with it.

Our Grandson still loves his Rainbow Lake quilt and it’ll always be here for him. I hope someday in the far far far future to give it his child. I do hope that they enjoy it as much and we have. There’s alot of special memories in that Rainbow Lake.

Wishing you all beautiful memories of rainbows and smiles.rainbow

The theme for this week challenge is ROY G. BIV. The first thing that came to my mind to share was about the Rainbow Lake quilt. I went back in my old files trying to find my original unedited photos, but I couldn’t find them, so I had to use old edited ones. I edited the photos to make them bigger and that explains the lower quality. For this challenge I hope the story helps makes up for the photo quality.

 ~*~*~*~

Wishing you all fun with the WP photo challenge!z00m

spgrnbgln

Farm Kids Quilt (2)

q00
0rangespacer2

Repost from –> August 31, 2011 (edited)
My Farm-Kids Quilt is finished
How I quilt a quilt on my regular sewing machine

August 31, 2011 –> I finished my farm-boy & sunbonnet sue quilt today. I’m pleased as peaches with it. Especially since it was the first queen size quilt I ever made. Originally I made the quilt top full-size to fit our bed. I decided to change it to a queen-size because someday we’re going to need a new bed and I figure we’ll buy a queen-size instead of getting another full-size. Because of the extra-added size, I ran into a few issues, but I managed to work them out okay.

I want to share the method I used to quilt it. I’m lousy at taking quilt photos because I can’t get a really good angle, but hopefully, you all can figure out the gist of what I did.

q1
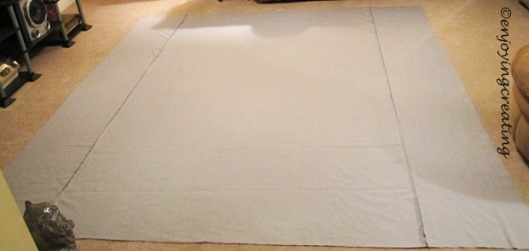
1) Lay backing on the floor wrong-side up

q2
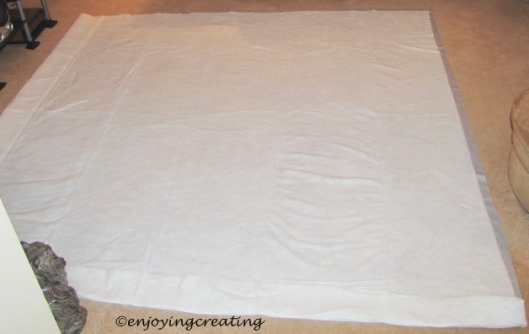
2) Lay batting on top of backing

q3
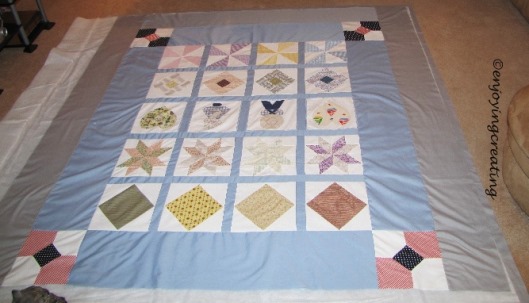
3) Lay quilt top right-side up on top of batting.

q4
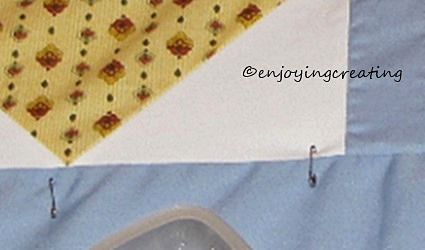
4) Starting from the outer edge, Use safety-pins to join the top, batting & backing together.
Put safety-pins every so many inches all across the quilt.
q4a
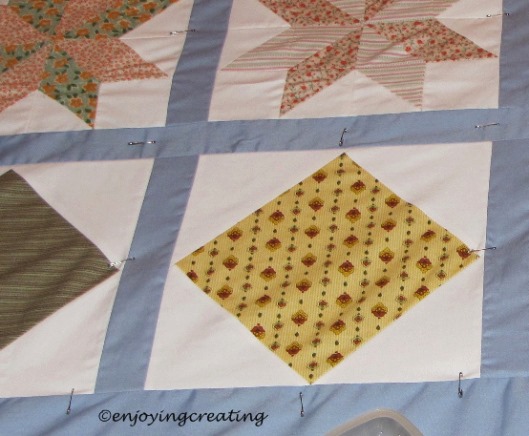
I roll the quilt up as I go because it makes it easier to handle.
q5

q6
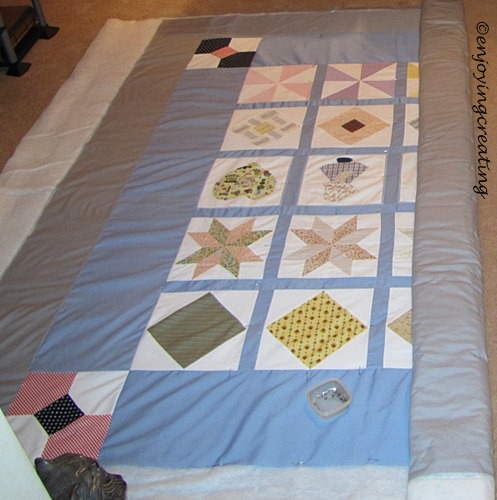
5) After it’s pinned all the way across,
unroll quilt and spread it out flat.

q7
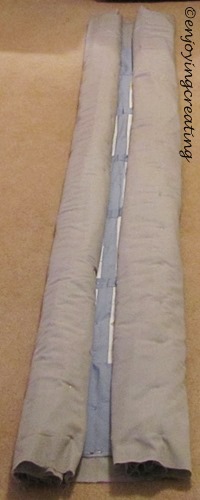
6) Starting at outer edge, roll each side to the middle

q87) Carefully slide the quilt under the pressure foot.

q98) Starting in the middle, Sew in the seam (ditch) or near the seam.
Be careful and remove the safety pins as you go and don’t sew over them.
Unroll the quilt as you go.

After you finish the first half, flip the unrolled half around and place the quilt back under the pressure foot and continue until you reach the outer edge.
*The main idea is to start at the center of the quilt and work your way to the outer edges.

q10
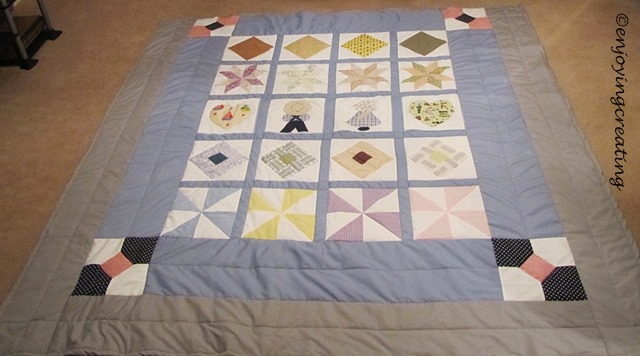
9) Here’s the finish quilted quilt
It’s 90″x93″ inches

q11
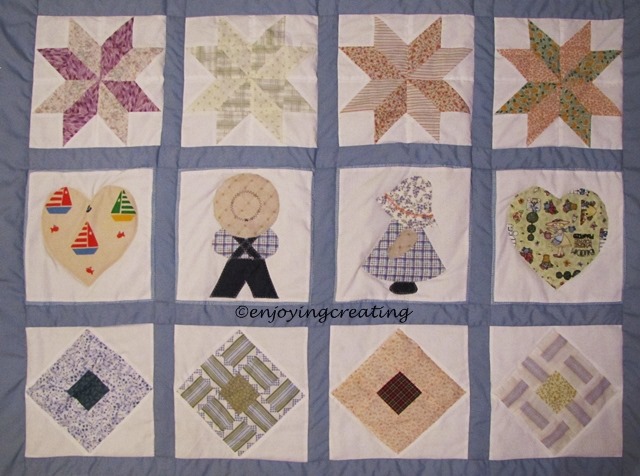
10) Above photo is the middle after it’s quilted.

q1211) Here’s what the back of the finished quilt looks like

q13
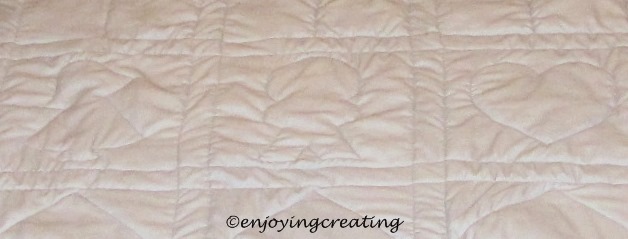
12) Here’s a close up of the back of the finished quilt.

All-in-all I think it turned out quite well.
It’s soft and snugly and will be warm this winter.

0rangespacer2

Today, January 24, 2015

q00After I finished the quilt I didn’t like the squared corners, so I rounded them off.
Also, originally, when I made this quilt we didn’t have a queen size bed. I guessed at the dimensions.
We got a queen size bed this past fall and I was surprised delighted to see my quilt fit perfectly.

Wishing you all happy crafting.
t6001
spgrnbgln

Farm Kids Quilt (1)

frmkds1

Repost from –> July 11, 2011 (edited)
Weekly Photo Challenge: Old Fashioned

The topic for July 11, 2011 week’s photo challenge hit right in sync with what I’ve been up to lately. I get nostalgic from time-to-time and try to find or make something from the past to reconnect with my memories. Gardening season is particularly nostalgic for me because my parents planted a big garden every year. My Mom loved it and spent as much time as possible tending it and harvesting the scrumptious veggies. I’m thankful I live where I can have a garden because gardening makes a special connection of so many treasured memories for me.

This year along with my thoughts of Mom’s joy of gardening came the memories of her joys of sewing and quilting. These thoughts put me into the quilt making mood. I wanted to make one like a sampler quilt of the ‘old fashioned’ designs that were Mom’s and my favorites.  Mom made many beautiful quilts. In the early years all her quilts were to keep our large family warm and snug at night. In later years after we young’uns were grown and in our own homes, she’d make quilts and donate most of them to charities, but a few she gave to family. I have a couple that she made me and I truly treasure them.

I’m having to make the patterns from scratch and it’s not been an easy thing to do. I look online for the closest design and then I take paper, pencil and ruler and make them like I remember Mom’s to have been. I’ve a great admiration for my Mom and the way she would whip through making a pattern by grabbing a piece of paper and scissors and just cut it out freehand with no measuring. After she finished a quilt top, she would either quilt it on her sewing machine or do the tacking method. Mom was a talented seamstress and could sew up most any design of quilt or clothing or anything else without a store bought pattern. She was truly an artist with fabric.

When I started making my quilt blocks I wanted a couple of them to be farm kids. My Mom had a farm-boy quilt top that she made when she was a teenager. She also had an incomplete unfinished farm-girl quilt top. I always loved the quilt tops and wish she had of finished them into full quilts. Every so often, she would take the farm-boy quilt top and lay it out on the bed and speak about it in such loving nostalgic tones. It was just wonderful. Mom hand sewed each applique into place. It must have taken her months of dedicated work to get them all together. I recall that some of the fabric pieces had their own story of where she got them. I wish I could recall everything she’d said about it. The farm-boy squares were pieced together with red fabric borders (that’s the color I remember it to be.) It was such a fun and cheerful quilt top.

I don’t know where Mom’s quilt tops are now and I didn’t have them to go by. I had to create the farm-boy from memory. I couldn’t find anything online that resembled him. There’s a Sunbonnet-Sam but he isn’t like Mom’s farm-boy. It took me a few days, but I finally managed to design what I think is a close rendition of him. The farm-girl was a bit easier, she’s known as Sunbonnet-Sue. She has many variations. I wish I had better memories of her but Mom didn’t get her quilt top out but just a couple of times. I’m lucky I even recall her at all. I think my farm-kids look okay. I cheated and used the sewing machine to applique them on. I’m too lazy and impatient to hand-sew them on.

Anyway, at this moment I have all my blocks made and will make a post on the quilt top when I get it all sewn together. I think Mom would be proud of my efforts. I remember how much she enjoyed when I made quilts for my son and grandson. I sure wish I had her talents for the ease of design and making the quilts. Mom was truly a wonderful homemaker: sewing, cooking, canning, gardening, yardening and so many other things.

Do you ever get in nostalgic moods and try to find or recreate a something from scattered bits of memory? How did it go? Are you like me and fairly satisfied with the results of your efforts?

Wishing you all good old fashioned down-home fun times of making memories and carrying on traditions.

0rangespacer2

July 25, 2011

I’m happy to report that
I found time today to finish my quilt top.
I think it turned out pretty well.
quilt-2011
My husband looked at it and told me, “That’s pretty. I feel warmer already.” lol
I hope I get it quilted before winter so we both can feel it’s warmth. :p

0rangespacer2

Today, January 23, 2015
Check back soon for the last post of the
quilting and finishing of my Farm Kids Quilt.

Wishing you all a happy weekend.
cloudhug
spgrnbgln

How I Coffee Dye Fabric

codg00-2015Back in 2011, I made two quilts. On the the first quilt I made, I ran into a problem of finding the right print fabric and I had to improvise. I coffee-dyed a piece of fabric and then cut my heart applique out of it and used it in the quilt.

I posted about it on my ex-blog Enjoying Creating. There was a discussion as to if the coffee dyed applique would hold it’s color in the years to come…
Well, over the years, I’ve washed my quilt 4 or 5 times. And the coffee-dyed heart is still holding it’s color.

This may not work on some fabrics that’s washed every week or month, but it worked-for-me on my heart applique.

Since it’s been a few years, I’m making this post mostly a repost of of my 2011 tutorial blog post (from my ex-blog) to share my method of ‘How I Coffee Dye Fabric’

——————————
‘How I Coffee Dye Fabric’
codg0
I couldn’t find the right fabric for a heart applique for a quilt block, (well, that’s a lie, I did find the fabric online, but I refuse to pay between 9 to 12 dollars for a half yard of fabric + shipping/handling)
I went through my fabric and found some that’s pretty close to what I wanted. The main-color is way too white and clashed dreadfully with the white background of my quilt blocks. It took me a few minutes to think of coffee dying the fabric. I looked up directions and was pleased to discover that it’s not too terribly complicated.
I adapted and adjusted some of the steps and am really happy with the way the block turned out.

Have you ever used coffee or tea to dye fabric? Did it do well? Did the the color hold up fairly well over time?

If you try my method of dying fabric with coffee, let me know how it does for you.
🙂
————
How I Coffee Dye Fabric

codg1
1) Make coffee like
you normally would
codg2
2) Place fabric in a glass dish
Pour coffee over fabric
Allow it to set for 30 minutes
codg3
3) Remove fabric from dish
wring out excess coffee
allow to dry
I put paper towels on top of my fabric square
& paper towels underneath it & ironed it dry

If a darker color is wanted repeat step 2 & 3
I repeated this twice for mine.
codg4
4) I used vinegar to set the color.
I put just enough vinegar on the square to
cover it and then let it set for 30 minutes.
Afterwards, I ironed it dry like in step 3

5) Wash the fabric with dish-washing detergent
rinse & let it dry or iron it dry again
codg5
Here’s the finished dye job

I cut a heart shape out &
appliqued it on my quilt block
codg6
Here’s a comparison to
the original fabric and the newly
coffee dyed applique heart.
I’m real pleased with it.

🙂

—————————
*Here’s some Hopefully helpful hints*
~~~
If you’re going to use vinegar to set the color, ‘DO NOT’ use an aluminum pan.
The first square I made, I tried using an aluminum pan and it was terrible.
The vinegar reacted with the aluminum and turned it a nasty splotchy dark color.
Here it is, on the left side of photo, next to a successful square to show the difference.
codg7
~~~
I froze the leftover coffee in a bowl and added the left over coffee in the pot each morning for a few days to it. Now I have a handy supply of coffee on hand, if and when I take a hankering to coffee dye fabric again.
codg8
~~~

Happy Crafting!
p0109

spgrnbgln

Internet issues update – quilt post plans

pcstuph0
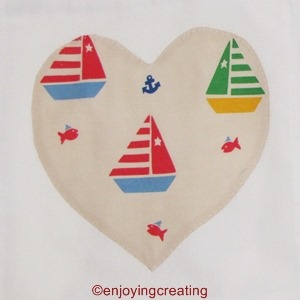
Our internet & phone issues worsened over the past few days.
Today we had the tech-guy visit and fix everything (hopefully).
He even sped our internet up a bit.
Hopefully, we’re ready for smooth surfing ahead.
compu~*~

IMG_8623There’s been some interest in the quilt in the photo with Sheli & my s-loom. I’m going to make 3 posts about the quilt. The posts will be re-post from my ex-blog enjoyingcreating. Some of the content will be updated or edited as needed.

The first post will be about my method of coffee dying one of the appliques.
The second will be the story behind the quilt.
The third one will be the quilting of the quilt on my sewing machine.

I’ll start posting my quilt posts soon… Unless my internet goes down or offline life needs my undivided attention…

sewmiconHave a dandy of the rest of the week!

graphics-rainbow-260262
spgrnbgln

Box of Colors Redwork Block

IMG_6776My Redwork block for today is from my love of coloring and coloring pictures (which this picture was on my ex-website)

I’m thinking I might should go get the grandson’s colors and color up a Spring time scene and tape it to the window. I do believe that’s the only way Spring is going to arrive this year… yes, I know it’s January and full on winter time, but we’re experiencing rare cold and snowy weather for our region and it only makes Spring seem that much further away.  ~sad sigh~

I’m thankful that so far snows in our region have been light and fleeting. My warm thoughts go out to the regions where folks are getting snowed under or are having heavy snows. I feel so sad for you all. I hope you all can put on a pot of soup and stay indoors until the roads are cleared and safer to drive on.

Here’s wishing you all warm thoughts
and happy dreams of Spring.

🙂

spcr1

Cat Redwork Block & Special Gifts

1-23-2014rwHere’s my Redwork block made from a coloring picture that I made of a Siamese-mix cat my Bff had once upon a time. He was a beauty named Simon and had a sweet personality.
I’m posting this block to remind everyone to take extra precautions with the pets during these freezing cold temperatures. Try to give them a warm place to sleep and plenty of food to eat.

IMG_7549We got a light dusting of snow the other day. The temperatures are in the low teens again. It’s so cold the sun doesn’t even want to come for but a few scant moments at a time. I miss the sunshine and warm weather. Oh well, eventually, Spring will peek it’s green little self out from the ground and then we’ll have a ‘last frost’ and then it’ll be full blown gardening season again.

Last year we decided that we wasn’t going to have a garden this year except for a couple herbs and tomatoes plants in my porch garden. However, since my husband has healed so wonderfully from his heart surgery and is feeling ever so much better, we’re now talking about having a garden again this year. Not a huge one, but we are going to try to have a small one.
IMG_7554I was so happy about our planning for a garden that I told my Brother. He was happy to hear it because he’s been worried about my husband (and me too.) He ordered me a recipe book and a gardening book and some seeds to help get our garden planning off to a good start. It’s so sweet of him to give me such a special and a most appreciated gift.
There’s some really delicious recipes in the book that I’m looking forward to trying. And I’m anxious to try some of the advice in the other book to grow the tomato seeds my brother gave me.  I can hardly wait to kick off another gardening season.

I can’t seem to get myself organized this week. I’m going to try to get caught up with my blogging, visiting and commenting today. Try being the key word here. 😉

Wishing you all terrific Thursday.
Bundle up and keep warm!
t09017
spcr1

Star Redwork

1-17-2014rwMy Star Redwork is dedicated to the many dreams and wishes I made on stars throughout my life.

I don’t think I’ve ever seen a ‘First Star at Night’ twinkling alone in the evening sky without immediately saying the wish-refrain and making a wish. The silliness and fun of it makes me happy… (plus you never know when your wish and life might line up to make a super cool synchronicity. 😉 )

“Star light, star bright
First star I see tonight,
Wish I may,
Wish I might,
Have this wish, I wish tonight.”

“I wish a bright and cheerful weekend
for all my Blogging Buddies and Readers.”

ecstar
spcr1

Shell Redwork Block

1-14-2014rwThe first time someone showed me how to put a shell up to my ear and I could hear the ocean, was the first time I knew there’s truly magic in the world.
After that, I wanted to go to the ocean and listen to it in person. But the ocean was a world away and just a dream for a poor little country girl. The ocean was only for sailors, rich folks and movie stars.

As I grew up, I was overjoyed to learn that anyone could go to the ocean. All it takes is saving money and planning… and that’s just what we did… for many years we made the beach our home for vacation each summer.

It’s been many years since out last vacation there, but we plan to return someday to the tropical dreamland of palm trees, shells, sand, waves crashing, dolphins and enjoy the many enchantments of the salty shores.

Here’s wishing you all a magical joyful day.
🙂
isle
spcr1