

The other day I saw a photo of Bisquick chicken pot pit and of course that made me want to make one. I’d never made it before. Thankfully the recipe isn’t too complicated and I had all the ingredients on hand. It turned out really pretty and mighty tasty.
Here’s a link to the recipe: Bisquick Chicken Pot Pie
Here’s my adjustments and changes to the recipe:
I used Pict Sweet frozen vegetables
I used 1% milk
I used Egg Makers (liquid eggs)
1/8 tsp black pepper
1/8 tsp thyme
I baked my chicken pot pie in a deep baking dish (about 8-inch x 2-inch deep). I didn’t think any of the pie plates or pans I have would have worked very well.

The recipe calls for cooked chicken. It didn’t specify how to cook it. I needed to make some broth anyhow so I took care of 2 food stuffs at once and boiled the chicken with some herbs, onions & sweet peppers. The chicken turned out beautiful and tasted really good. It worked great for the pot-pie. I was going to make chicken salad with part of it, but my husband and Shelibean decided that it was the perfect snack to nibble on in front of the tv. lol
Even though I used skinless boneless chicken breasts, I still strained the broth 3 times through 8 layers of cheesecloth.
(Then the next day it occurred to me that I should have used a coffee filter to strain it through. It would have been less work. I hope I can remember the coffee filter the next time I make broth.)
I let the broth cool and pour one cup portions into square plastic containers then freeze them. I take the frozen broth ice cube out of the plastic container and put them in vacuum pack bags, date them and put them in the freezer for future use.
I love the way these look.
(Does that make me odd? lol)
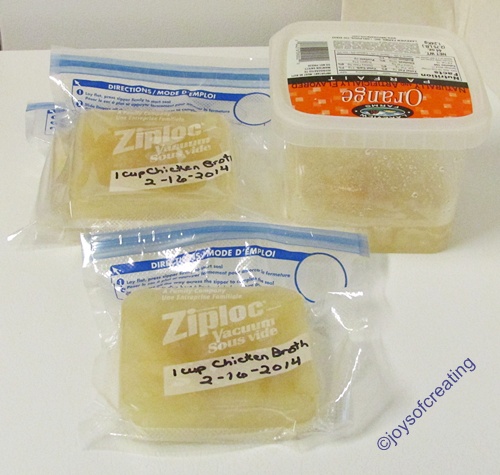
We use alot of broth in recipes and since salt is a problem in the processed foods, salt-free homemade broth is a welcomed staple to have on hand.
The sun is shining and the temps are warming up. It’s 57°, if the wind would stay calm, it would be a lovely day to go for a walk and look for signs of green.
I’m so happy to finally dare-to-hope that maybe Spring-like weather might be here soon.
Hope you all have a lovely day!
🙂

 My above photo is some of my left over yarn wrapped around clothespins. I did this to show that I think it’s a neat idea. This idea could be used for embroidery thread, yarn, ribbon, twine or most anything stringy to help keep them neat and tidy.


 I got frustrated at first with the skein tumbling and capturing everything including the attention of (our dog) Sheli. He and I got into a bit of a kerfuffle for a few seconds.
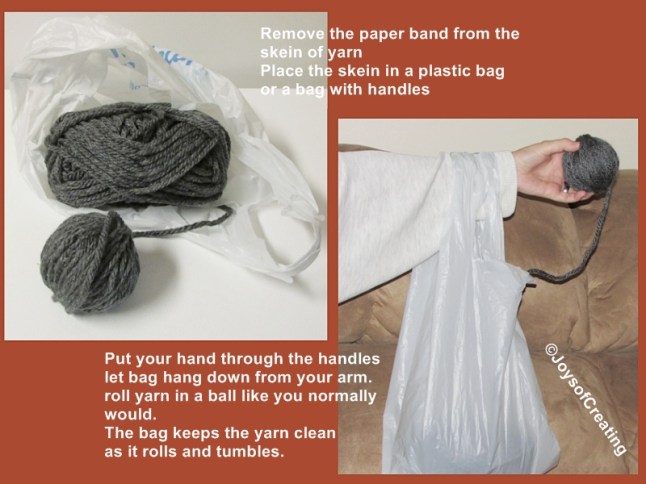
 Anyway, this was a pretty good experiment because now if I want to make an blanket of granny squares out of bulky yarn, I can better guess how much yarn I need.
 We were shopping at our local department store and my husband decided that our Shelibean deserved a new toy since he hadn’t got one in a couple weeks
 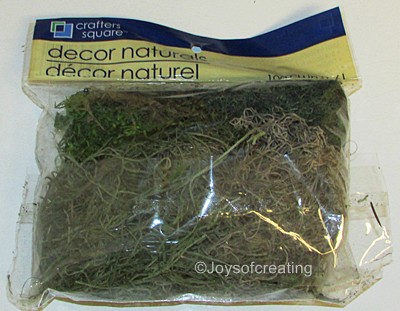 We went to an everything-for-a-buck store this weekend. I discovered, They have bags of some sort of moss. I thought it may be something I could use in one of my crafts, so I got a bag of it and put in a little store-tote-basket. After shopping a bit, we went to the check out.
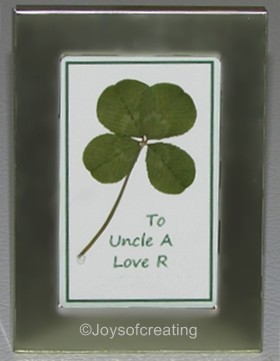 On a more positive note: Back in November when my husband had heart surgery, our 8 year old great niece is a sweetheart and when she found out about my husband having to have surgery she gave him a 4 leaf clover that she’d found and preserved. I bought a frame for it this weekend and have it proudly displayed. We love our great niece and this precious reminder of the sweet innocence of a child sending her Great Uncle an extra bit of luck and love to get well soon. (I edited their names out of the photo. 😉 )