Okee-dokee, I’m going to give you all heads-up:
*The first part of this post will be about an easier method that I found to melt butter in the microwave. This is the one thing that went right for me.
*The second part of this post is a too-long rambling story about my trying to make a no-knead sandwich bread going by a recipe video. The bread turned out dreadful due to a flicker of bad luck.
So, you’re welcome to read one part and not the other part or both parts or neither parts.
You’re welcome to comment on any part or no parts of this post. lol
Thanks so much for visiting, I appreciate it. 🙂
 Melting butter in the microwave
Whenever a recipe calls for melted butter (Margerine, oleo), Instead of using the stove, I use the microwave. Most of the time, I pretty much have a splattered mess, no matter how careful I am to cover and vent a deep bowl with chopped up butter.
Then today, I had an idea, that worked quite well for me.
I chopped the butter up. put it in a small glass bowl, put the bowl in a plastic bag, I left the bag open.
I set the bag in the microwave and heated it for 10 seconds at a time until it gradually melted the butter.
I waited several minutes to let it cool, then carefully removed the bowl and my melted butter was ready to use.
~*~
The Sad Sandwich Bread
I’m not much for following recipes on videos. I’m old school, I’m better at following written directions and photos are helpful too.
So, whilst feeding my newest distraction of watching videos, a bread baking video popped up in the feed. It was for a no-knead sandwich bread. I thought that sounds like a good idea. I watched the video. It was simple enough instructions.
I gathered my ingredients, set them on the counter and let them warm to room temperature. I even used a thermometer to check they were warm enough.
 I followed the directions, except for the amount of liquid. I left out 1/2 cup because when I added it to my flour mix, the mix started to become too soupy. I covered the bowl with plastic wrap and put it in a pre-heated microwave and left it to rise.
(I use my ‘turned-off’ microwave as a hot box. It keeps the heat in quite well.)
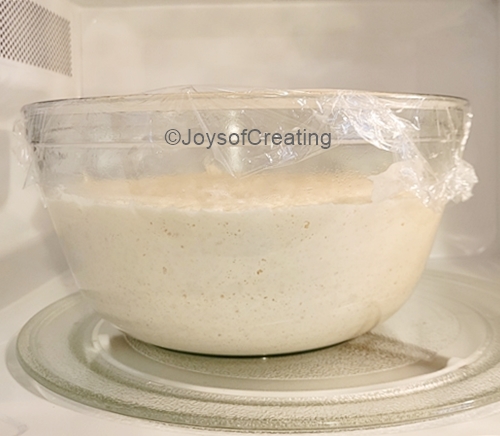 I let the dough rise for 30 minutes, checked on it and it looked like it was doaming quite nicely. The recipe called for a 40-minute rise. So, against my better judgement, I left it 10 more minutes. Not a good idea. It started to flatten on top. I should have stopped at 30 minutes. I figured that perhaps, it wouldn’t matter all that much.
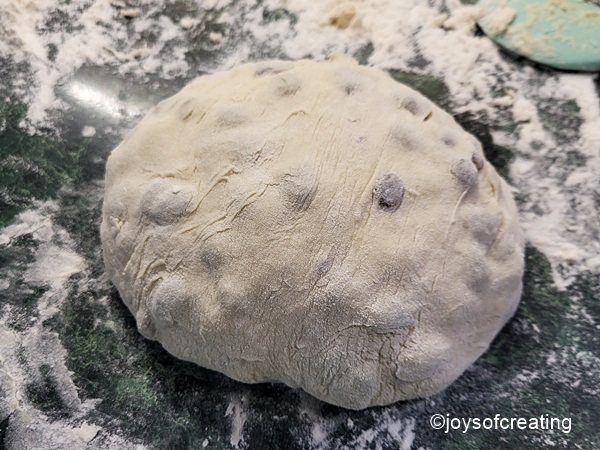
 The dough was nice and sticky and stringy, just like the video showed it should be.
It laid in the pan just as the video had shown.
As instructed, I let it proof for 40 more minutes.
My oven was preheated and ready to bake this yeasty wonder.
 I put the pan in the oven and set the timer for 40 minutes. I finished cleaning up the dishes. I folded a load of laundry and then went in the livingroom and watched Holiday Baking Shows with Shelibean.
After about 10 minutes the electric flickered, but I paid it no mind. Nothing turned off, not the lights nor even the tv. It’s not unusual for the electric to flicker, it’s normal for us.
 After 30 minutes I checked on the bread. It was not baking pretty and hadn’t risen in the center like it should have. I’ve not baked too many breads that didn’t get a nice rise in the oven. The flat middle was a frustration for me.
I went online and looked up the reasons for bread not rising in the middle. None of the reasons fit my situation, except when I read that temperature might be too low.
I thought that could be it. I kind of suspected the temperature might need to be a bit hotter than the recipe called for, but it’s been a long time since I baked a yeast bread, so I trusted the recipe.
I went into the kitchen. I saw the digital stove display thing read 350. I thought, yep, that’s got to be it. It’s too low. So, I went to the stove to raise the heat and discovered that the darned oven was turned off.
Well, shucks, it must’ve turned off when the electric flickered. I was not happy. The 350 on the digital stove display wasn’t the degrees, it was the time 3:50.
I’m such idiot. lol
I turned the oven on 375° and left the bread in the oven. After the oven heated, I let the bread bake for 25 minutes and then left it to brown deeper on top for 10 more minutes.
 I took the pan out of the oven and set it on a rack. The loaf looked awkward, but it sounded hollow when thumped. I hoped it was baked through.
 I buttered the top good and proper. The recipe said that buttery the top when it’s first out of the oven, will keep it soft like a good sandwich bread should be.
 The loaf came out of the pan beautifully, which gave me even more confidence that perhaps, it was going to be okay after all.
My husband looked at the loaf. He said, “It’s not a bad looking bread. It might surprise you and be just fine.”
I said, “Yes, but it’s a sad looking bread.”
 It sliced easily. The first few slices looked almost good; however, it wasn’t baked thoroughly. It was doughy to the touch. It wasn’t exactly good enough to eat, the bit around the edges were, but that was it.
My husband was a good sport and toasted some of it, but that didn’t help. I thanked him for being a sweetheart and trying to make it okay.
 I sliced it in half lengthways to show how dreadful and raw it was on the inside. I guess the tunneling cavern is the reason it sounded hollow.
I hate that it was such a sorry loaf of bread, but it was fun trying the new recipe. I think I’ll stick to the bread recipes that I’m familiar with.
Or perhaps, I’ll try this one again.
I can’t say for sure.
At least I got a blog post out of it.
If you stayed with me through my ramblings this far, I thank you ever so much. 🙂
I wish you all a wonderful rest of the week full of happiness with baking or crafting or thinking about good times or going out and enjoying the sunshine.

 While shopping, I decided in the bread isle at the grocery store that I would make some raisin bread. It’s been so long since I made raisin bread, that I couldn’t remember my recipe ingredients except for flour, cinnamon and raisins.


 Unfortunately,
 It’s firm and more savory and not very sweet. It bakes up beautifully… And it’s crustless!
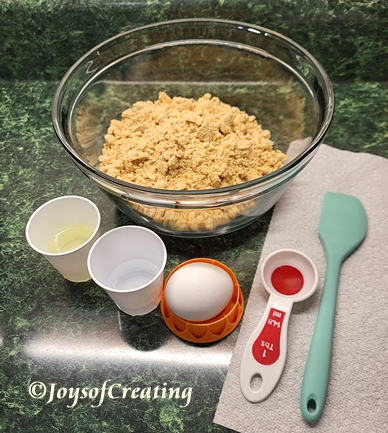 Not wanting to trek halfway across the states to buy some peanut butter cookies, I decided to start trying to make our own. I bought a couple packs of peanut butter cookie mix of a familiar and trusted brand.
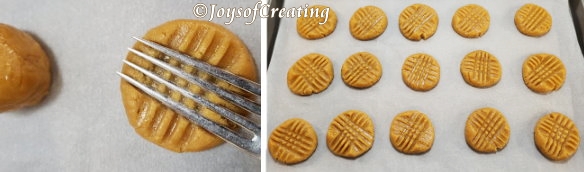 I haven’t baked cookies in quite a long time. Even with the mix and easy directions, I figured I’d mess them up.
 Oh dear, the cookies turned out ever so tasty and the texture was perfect. My husband and I really enjoyed them. They were just as tasty on the second day when only 2 cookies were left to enjoy. (And this is the reason I don’t bake cookies much anymore. lol)
 These peanut butter cookies are as close as I’m going to get to the ones from years ago. I’ll happily make them again!
 I condsider my attempt at making Chicken Cordon Bleu a success. I’m always happy to add another tasty recipe to our menu.