 8 years, it’s hard to believe.
Thank you all for being with me through my many starts
and stops and starts and slows and well…
I hope to be here with you all through many joyous
new years of blogging along with you to come.

.

8 years, it’s hard to believe.
Thank you all for being with me through my many starts
and stops and starts and slows and well…
I hope to be here with you all through many joyous
new years of blogging along with you to come.
.
I’ve used up some of my extra yarn by crocheting some house footies. I discovered that I enjoyed making them, so, I cheerfully crocheted myself several pair.
Some are low top.
Some are short top.
Some are high top.
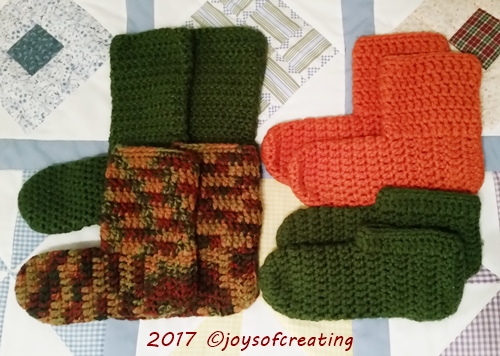 And one pair is over-the-top
for just jolly good old fun.

.
One of my favorite atmospheric phenomenon is a Sundog.
A sundog is a magnificent bright spot in the clouds beside the sun.
Here’s a few photos of one that was in our skies October 1, 2017.


Wishing you all a wonderful Wednesday.
.
 Just a bit of early Turkey-Day humor!
Have an enjoyable rest of the week!
.
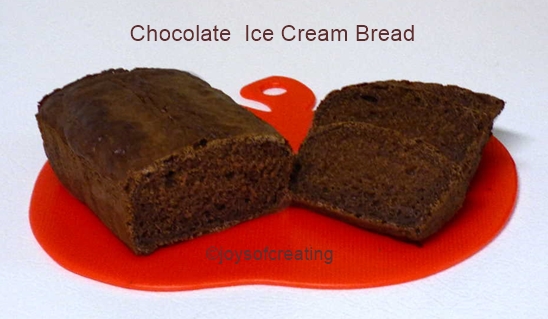 Well, here it is ‘Chocolate Ice Cream Bread’.
It tastes like a cross between a brownie and a chocolate cake.
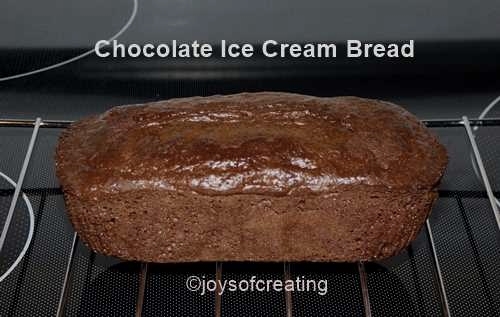 I’m happy that I’ve tried all 3 flavors in the Neapolitan ice cream.
It’s an easy recipe and bakes up beautifully.
*I used a small batter made like my basic ‘Boiled Custard Bread’ recipe.
Use melted ice cream instead of boiled custard.
Add flour a little at a time to the melted ice cream until the batter is a creamy consistency.
If you get the batter too thick, thin it with a little bit of water.
.
