Super Solid Granny Square

While blog surfing I came across a blog called ‘Sparkly Toad’. I was so happy to see that Julie has made a pattern for a solid granny square. I’ve always wanted one, but never found one.

I was so excited about it that I spent the afternoon working with the pattern. Julie did quite a good job on the pattern, but I had a hard time getting round 4 to work out. I didn’t have enough stitches in round 3 to accommodate the pattern and make the four corners. It’s possible it was just me not reading the pattern right. I do have that problem sometimes. It took awhile, but I worked out a bit of a different formula and was able to get round 4 to turn out right.

For the complete pattern please visit:
Super Solid Granny Square at Sparkly Toad

Julie contacted me and sure it enough I read it wrong. I don’t know what I was thinking.

I’m sorry Julie, for misreading your directions.
Thanks again for a great pattern.
Now, I’m off to make another one and see if I can follow your directions right this time.
🙂

edited out my changes

IMG_9434

my 1st attempt

——————————–
edited in 4-17-2014:

Here’s my granny square I made by following Julie’s pattern the right way (hopefully).  This would make an awesome warm blanket. I have plans to use this pattern in the future. It was an easy pattern to do once I got the hang of it.

IMG_9445
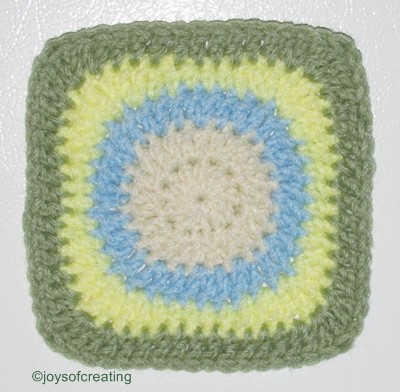
Thanks so much for the super pattern Julie.

🙂

Happy Crafting Everyone!
crochet

3-spcbg

Almost Wordless Wednesday (Nature Photos)

These photos have captions, you can hold your mouse over them and read the captions or click on the photos and they’ll open and you can read them and also scroll through them.

Happy Wednesday Everyone.
I hope you all have a pleasant rest of the week.

🙂

3-spcbg

Crazy Calming Crochet Stitch

IMG_9103

My apologies on this photo, the sun went behind a cloud as Sheli posed perfectly and I took the photo. The dark blur sort of in the upper left side is a bumblebee that has taken up residence on our back porch. Sheli was watching it fly around.

This is my finished crochet project that I mentioned the other day,  a 56 inch x 44 inch blanket.
I got the idea for this blanket from my Blogging Buddy Charlotte. I’ve always wanted to try this pattern, but I didn’t think I could do it. Then Charlotte posted a beautiful baby blanket she crocheted by this pattern. She said it was calming work and not too difficult. She gave a quick and easy explanation of the stitches. It clicked hope in my heart that perhaps I could do the stitch and make something pretty too.

I spent 30 minutes trying to make the pattern work for me, but I’m not skilled enough for free-hand on such a lovely stitch, so I went and looked up a pattern… well, I found some, but I couldn’t make them work either. I felt like such a gourd-head.

I was about to give up when I saw a link for a vintage pattern supposedly written as it was in 1899 and 1917: How To Crochet The Crazy Stitch. I thought it couldn’t hurt to check that out… wow, I took right off following the pattern… now what does that say for my mentality? lol The only change I made to the pattern was, instead of using the 3 double crochet that it calls for, I used 2 double crochet. The 3 double crochet made it look too bunchy.
There’s a few patterns on that page for the crazy stitch. The one from 1899 calls for treble crochets.

Sheli fell in love with our new blanket of course. I let him pose with it while I took photos.
The first person that used this blanket was my grandson, he snuggled underneath it to watch movies this weekend.

It’s a nice size blanket and not too difficult to make. I think it went quite quickly, but then I love to crochet.

I echo Charlotte’s words that it’s “Calming work”
Thanks Charlotte for inspiring me once again. I’ve really enjoyed making a bright new blanket for my family to enjoy. ((hugs))

IMG_9286

I hope you all have a great week
& can do a craft or activity that you find calming & fun.

crochet
3-spcbg

Beautiful Weekend for Gardening

IMG_9162It was a beautiful weekend. The temps were in the 80’s and it was mostly sunny. The wind was gusting from time-to-time, but thankfully it wasn’t chilly.

IMG_9356
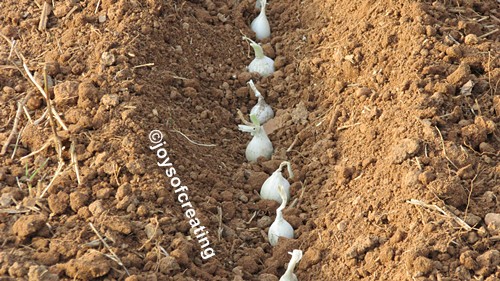
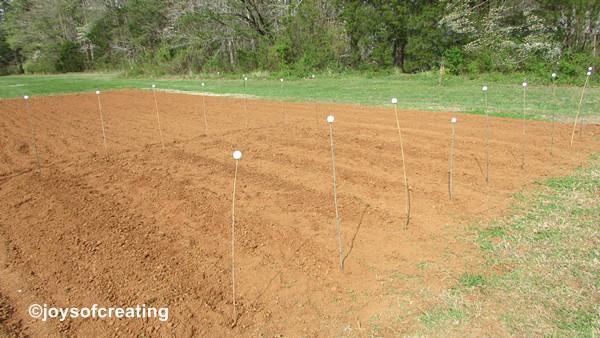
My husband rotortillered the garden and got half of it planted. He planted onions, beans, potatoes, spinach and radishes.
I like his row markers. It’s bamboo with plastic golf balls on top.  🙂

IMG_9250.IMG_9252

It rained last night and the temps are dropping, it’s  in the low 60’s today. It’s a gray dreary day. It’s not supposed to get below freezing or anything, but it might frost at night or get cold enough to nip or kill non-cold-tolerant plants/buds/blooms.

IMG_9348
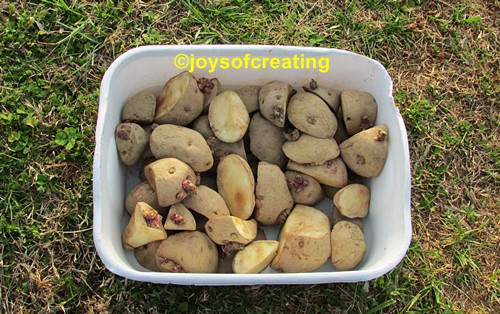
It’s officially Dogwood winter.
and we still have several little winters to go before warm weather sets in for the year.

The next few weeks will be up and down like this. This part of Spring usually costs home-gardeners dearly because they’ll be convinced the cold snaps are over and plant plants that aren’t cold tolerant and then lose them all with a frost. I’ve seen it happen so many times. It always makes me sad.
Some folks, like us, keep containers on hand to cover up any plants in the garden, during the colder nights that might frost or be cold enough to kill plants .
We try to be patient to plant, but it’s so very hard when the sun shines and the stirring of the need to be out digging in the soil overwhelms us.

Planting/starting seeds/seedlings in trays in the house helps curb some of my anxious need to plant in the garden during this ‘chancy’ time of the season. I tend the plants so carefully that I feel a bit like they’re my babies and I become over protective of them. I’ll keep them in the house during cold days and nights. When the days are warm I’ll tote them outside and set them on the porch. it’s a lot of work, but I need the exercise. lol
IMG_9390..IMG_9387
I’m quite pleased with my seedlings. They’re healthy and happy. I transplanted them to bigger containers.
I took a photo before I wiped off their new cups, I hope you didn’t mind seeing a little dirt. lol
IMG_9380..IMG_9384
I planted my basil and parsley in they’re permanent containers for season. They’ll be just fine growing in them during the Summer. I love having fresh herbs on hand. 🙂
IMG_9386I still need to wait for the peppers to grow some true leaves before I transplant them to a larger container.

It was a peach of a weekend. My husband and I look forward to more pleasant weather and gardening.

I hope you all had a pleasant weekend and was able to go outside and enjoy some soul refreshing sunshine and warm weather. 🙂  (except for Barb, I hope she’s enjoying some nice cool breezes and getting a much deserved break from the hot summer temps of Oz. 😉 )

Wishing you all a great week!
gardeningcouple3-spcbg

Great Glowing Easter Eggs

egglight1
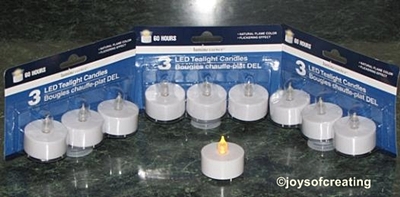
As I was going through my old blog picture/files I came across the many different holders/displays I made for battery operated tealights.
I decided not to wait til Friday to post this Flashback because Easter is coming up and this might make a fun decorating idea for someone to use.

egglight2
This is one of my more favorite ideas that I put together. I placed battery operated tea lights in plastic eggs. They’re such a fun inexpensive decoration.

egglight3
My husband told me that I needed to drill a 1/16 inch hole in the plastic egg so the heat from the battery operated light can vent out.

So, if you decide to use this idea of putting battery operated tealights in plastic eggs, be sure to drill a hole in the eggs to help the heat vent out.

Be sure to keep an eye on the eggs and tealights in case they over heat and need to be turned off.

Here’s wishing you all a very bright
& cheery rest of the weekend.

smileggs

~*~
Here’s a photo pf the battery operated tealights I use.egglight4
🙂
3-spcbg